A well-pro cast iron Dutch oven is a cherished kitchen device, imparting brilliant sturdiness and a certainly non-stick ground. Whether you’re a seasoned cook dinner dinner or a amateur within the culinary global, information a way to season a cast-iron Dutch oven is crucial for retaining its first-rate and typical performance. In this manual, we will walk you thru the step-through-step procedure of seasoning your forged iron Dutch oven, ensuring it remains a versatile and reliable companion in your kitchen for years to come. Let’s dive into the artwork of seasoning and unfastened up the general potential of your forged iron cookware.
1. Choosing the Right Oil
Oils with excessive smoke elements, which include flaxseed, grapeseed, and canola, are perfect for seasoning. Flaxseed oil is in particular encouraged due to its capability to polymerize and create a hard, prolonged-lasting coating. Grapeseed oil is every other superb choice, providing a excessive smoke factor and impartial taste. Canola oil is widely to be had and less expensive, making it a popular choice for masses cast iron fanatics. Each of those oils provides benefits that make contributions to a sturdy, protecting layer to your Dutch oven, making sure it remains rust-unfastened and clean to easy. By choosing the right oil, you may beautify the overall performance and sturdiness of your solid iron cookware.
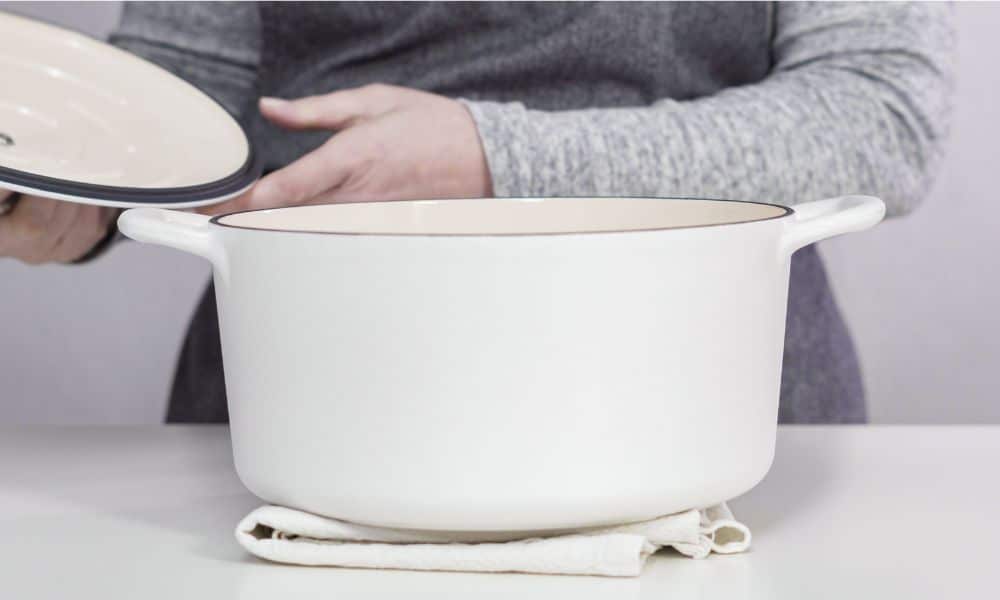
2. Cleaning the Dutch Oven
Start by removing any old seasoning and rust. You can do this by scrubbing the surface with a stiff brush and a mixture of coarse salt and water. Or by using a specialized cast iron Dutch oven cleaner. For stubborn rust or residue, consider using a vinegar soak or a gentle steel wool pad. After removing the old seasoning and rust, rinse this oven thoroughly with warm water. Make sure to dry it completely to prevent any moisture from causing further rust.
3. Drying the Dutch Oven
Thoroughly drying your solid iron Dutch stove is a critical step in the seasoning technique to save you rust and make sure a strong bond among the oil and the forged iron. After cleaning, it’s important to dispose of all moisture from the surface. One effective method is to dry the Dutch stove with a clean, lint-loose material, making sure all water droplets are wiped away. For greater guarantee, vicinity the Dutch oven on a stovetop burner set to low warmth or in an oven preheated to 2 hundred°F (93°C) for about 10-15 minutes. This mild heat will evaporate any ultimate moisture, leaving the cast iron completely dry and prepared for seasoning. By ensuring your Dutch range is very well dried, you create the correct situations for a successful seasoning technique, supporting to keep the integrity and durability of your cast iron cookware.
4. Applying the Oil
Begin by using pouring a small amount of your selected oil, such as flaxseed or canola, onto a smooth fabric or paper towel. Rub the oil over the entire floor of the Dutch stove, which includes the indoors, outdoors, and lid, making sure every part is protected. To avoid extra oil, use a thin, even layer an excessive amount of oil can result in a sticky, uneven end. After coating, use a dry material to wipe away any excess oil, leaving only a mild sheen. Proper oil software is key to accomplishing a faultless seasoning, preventing commonplace problems like stickiness and uneven layers.
5. Baking the Dutch Oven
Preheat your oven to 450°F (232°C) to ensure the oil bonds properly with the cast iron. Place the Dutch stove upside down on the oven’s middle rack to allow any excess oil to drip off, preventing pooling and ensuring an even coating. You might want to place a baking sheet or aluminum foil on the lower rack to catch any drips. Bake this oven for one hour, allowing the oil to polymerize and form a durable, non-stick layer. After an hour, turn off the oven and let the Dutch stove cool inside to room temperature. This gradual cooling helps the seasoning set properly.
6. Cooling and Repeating the Process
Once the baking time is complete, turn off the oven and let the Dutch oven cool down inside the oven gradually. This slow cooling process helps the polymerized oil bond firmly with the cast iron, creating a durable, non-stick surface. For optimal results, it is recommended to repeat the seasoning process multiple times. After the Dutch stove has cooled to room temperature, apply another thin layer of oil and bake it again at 450°F (232°C) for one hour. Repeating this process two to three times builds up multiple layers of seasoning, enhancing the durability and effectiveness of the non-stick coating.
7. Maintenance Between Uses
For daily care, clean your Dutch oven with warm water and a soft brush or sponge immediately after use. Avoid using soap, as it can strip away the seasoning layer. If food residue is stubborn, use a paste of coarse salt and water to gently scrub it away. Always dry this oven thoroughly to prevent rust, and apply a light coat of oil after each cleaning to maintain the non-stick surface. Avoid common mistakes such as soaking the Dutch stove in water, using harsh detergents, or cooking acidic foods frequently, as these can damage the seasoning.
8. Restoring a Worn Seasoning
Signs that re-seasoning is needed include a dull, patchy surface, food sticking more frequently, or visible rust spots. To restore the seasoning layer, start by thoroughly cleaning the Dutch oven with a stiff brush and mild detergent to remove any old seasoning and residue. Rinse and dry completely. Apply a thin layer of high-smoke-point oil, like flaxseed or canola oil, evenly across the entire surface, including the interior, exterior, and lid. Bake the Dutch stove upside down in a preheated oven at 450°F (232°C) for one hour, then allow it to cool in the oven. Repeat this process two to three times to build a robust, non-stick coating. Regular re-seasoning ensures your Dutch stove remains in optimal condition for all your cooking needs.
9. Storage Tips
To store your Dutch oven correctly, ensure it is thoroughly clean and completely dry before putting it away. Apply a thin coat of high-smoke-point oil, such as flaxseed or canola oil, to the entire surface to protect it from moisture. Store the Dutch stove in a cool, dry place with good air circulation. Placing a paper towel or cloth between the lid and the pot can help absorb any residual moisture and prevent rust. Avoid stacking heavy items on top of this oven to prevent damage.
10. Common Questions and Troubleshooting
One frequent concern is dealing with sticky residue after seasoning, often caused by using too much oil. To fix this, reheat the Dutch oven and wipe away excess oil. Another issue is uneven seasoning, which can be corrected by repeating the seasoning process multiple times for a uniform layer. If rust appears, scrub the affected area with steel wool, re-clean, and re-season the oven. For best results, use high-smoke-point oils like flaxseed or canola, and always apply thin, even coats.
Conclusion
Properly seasoning your forged iron Dutch oven is vital for boosting its overall performance and longevity. By selecting the right oil, very well cleansing and drying the Dutch stove, applying oil frivolously. And baking it at the best temperature, you can achieve a durable, non-stick surface. Regular preservation, together with right cleansing, drying, and coffee re-seasoning, ensures this oven remains in top situation. Storing it effectively and addressing commonplace problems will save you rust and damage. Allowing you to experience the advantages of your properly-pro Dutch range for years yet to come.