Bake bread in a Dutch oven is a time-venerated way of life that yields scrumptious, crusty loaves with minimal attempt. The Dutch oven’s heavy, lidded design creates the exceptional environment for baking bread, mimicking the situations of a professional steam-injected oven. Whether you’re a seasoned baker or a amateur, this manual will walk you thru every step of the approach, from choosing the proper substances to studying the paintings of kneading and baking. With a touch persistence and workout, you may be capable of produce bakery-outstanding bread inside the comfort of your kitchen. Let’s dive into the necessities of baking bread in a Dutch oven and remodel easy components right right into a mouthwatering masterpiece.
Necessary Equipment and Ingredients:
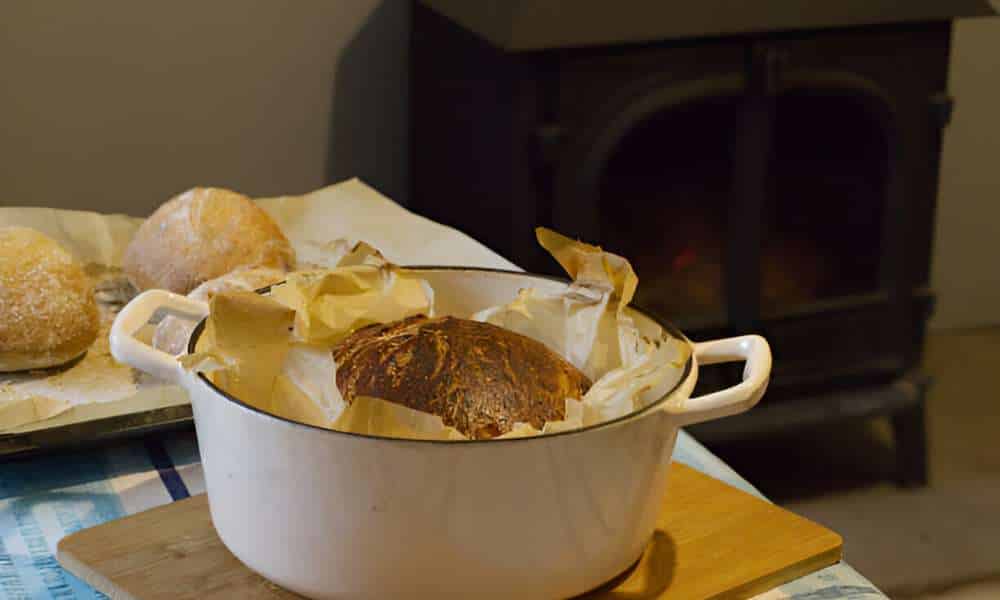
- Dutch Oven (Size And Material Considerations)
- Mixing Bowls
- Measuring Cups And Spoons
- Kitchen Scale
- Proofing Basket (Optional)
- Parchment Paper
- Thermometer (Optional)
1. Choosing The Right Dutch Oven
Choosing the right Dutch oven is crucial for a hit bread baking. The perfect Dutch oven need to be made from heavy solid iron, which retains and distributes heat calmly, ensuring your bread bakes flawlessly. A four to 6-quart size is normally encouraged, because it presents adequate area for the dough to expand while retaining the necessary steam surroundings. Look for a Dutch oven with a good-fitting lid to lure steam correctly, which is essential for developing a crispy crust. Enamel-coated options are also popular, as they prevent sticking and are simpler to easy. By choosing the right Dutch oven, you place the degree for baking lovely, artisan-quality bread at home.
2. Essential Ingredients For Bread Baking
When baking bread, the use of the right substances is prime to accomplishing the correct loaf. The important elements for bread baking consist of flour, water, yeast, and salt. High-first-class bread flour, rich in protein, provides the vital shape and chewiness. Water turns on the yeast and helps form gluten, giving the bread its texture. Yeast, whether lively dry, or immediate, is the leavening agent that makes the dough upward push. Salt no longer best enhances taste however also strengthens the gluten community. Some recipes may name for additional substances like sugar, butter, or milk, which can increase the dough and adjust its texture. By knowledge the role of every ingredient, you may create scrumptious, bakery-fashion bread every time.
3. Measuring Ingredients Accurately
Measuring substances as it should be is important for consistent and a success bread baking. Using a kitchen scale is the first-rate method, because it guarantees precision and enables hold the appropriate stability of elements. When measuring flour, it’s crucial to spoon it into the measuring cup and stage it off with a knife to keep away from packing it too tightly, which could cause dense bread. For liquids, use a clear measuring cup located on a flat surface at eye stage to make sure an accurate examine. Even small versions in component quantities can have an effect on the dough’s texture and rise, so take your time to measure carefully. By taking note of accuracy, you’ll reap an ideal dough consistency and enhance your bread-baking effects.
4. Mixing The Bread Dough
Mixing the bread dough is a vital step that determines the very last texture and structure of your bread. Begin by means of combining the dry elements in a huge bowl, ensuring the yeast and salt are properly dispensed. Gradually upload water, mixing with a wood spoon or your fingers until the dough starts offevolved to come collectively. The goal is to hydrate the flour thoroughly and expand gluten, which gives the bread its chewy texture. If the dough feels too dry, add a piece greater water, a tablespoon at a time. Conversely, if it is too sticky, sprinkle in a bit more flour. Once the substances are well blended and a difficult dough has formed, you are geared up to transport on to the kneading method. Taking care all through this mixing degree sets the muse for a beautifully textured loaf.
5. Kneading Techniques For Perfect Texture
Kneading is a important technique in bread baking that develops the dough’s gluten structure, leading to a really perfect texture. To knead the dough, first, flip it out onto a lightly floured surface. Using the heels of your arms, push the dough away from you, then fold it lower back over itself. Rotate the dough 1 / 4 flip and repeat the manner. This rhythmic movement allows to strengthen the gluten, giving the bread its chewy texture and structure. Knead the dough for approximately 10 minutes, or till it becomes clean, elastic, and barely cheesy to touch. You can also use a stand mixer with a dough hook attachment to acquire comparable outcomes. Proper kneading guarantees that your bread will rise nicely and have a light, airy crumb once baked.
6. First Rise: Allowing Dough To Ferment
The first rise, also known as fermentation, is crucial for developing the flavor and structure of your bread. After kneading, place the dough in a lightly oiled bowl, turning it once to coat all sides. Cover the bowl with a damp cloth or plastic wrap to retain moisture. Allow the dough to rise in a warm, draft-free area until it doubles in size, which typically takes about 1 to 2 hours. During this time, the yeast ferments the sugars in the flour, producing carbon dioxide gas that makes the dough expand. This process also develops the complex flavors characteristic of well-made bread. Patience during the first rise ensures a better texture and taste in the final loaf, so resist the urge to rush this step.
7. Shaping The Bread Loaf
Shaping the bread loaf is a key step that influences the final appearance and texture of your bread. After the first rise, gently punch down the dough to release excess gas. Turn it out onto a lightly floured surface and knead it briefly to redistribute the yeast. Shape the dough by folding it into itself to create surface tension, which helps the loaf maintain its shape during the second rise and baking. For a classic loaf shape, flatten the dough into a rectangle, fold one side into the center, then fold the other side over it, sealing the edges. Place the shaped dough seam-side down in a prepared baking pan or on a baking sheet. Proper shaping ensures an even rise and a beautiful, well-formed loaf that is ready for its final proofing.
8. Second Rise: Final Proofing Stage
The second rise, or final proofing stage, is essential for achieving a light, airy crumb and well-developed flavor in your bread. After shaping, place the dough in its baking vessel and cover it loosely with a damp cloth or plastic wrap. Allow it to rise in a warm, draft-free location until it has doubled in size, which usually takes 30 minutes to an hour. This stage allows the dough to relax and expand, producing a loaf that will have a tender crumb and good volume. Be careful not to over-proof, as this can cause the dough to collapse during baking. Proper proofing ensures that your bread will have a beautiful rise and an even, airy texture once it comes out of the oven.
9. Preheating The Dutch Oven
Preheating the Dutch oven is a critical step that ensures your bread bakes evenly and develops a perfect crust. About 30 minutes before the end of the second rise, place your Dutch oven, with its lid on, into your oven and preheat to 450°F (230°C). This high temperature creates an environment similar to a professional steam oven, which is crucial for achieving a crispy, golden crust and a soft, airy interior. The preheated Dutch oven traps steam released by the dough, allowing the bread to rise fully before the crust sets. Carefully transferring the dough into the hot Dutch oven can be tricky, so use parchment paper or a floured surface to help maneuver it. Preheating ensures that your bread starts baking immediately in optimal conditions, leading to a superior final product.
10. Transferring Dough To Dutch Oven
Transferring the dough to the preheated Dutch oven requires care and precision to maintain its shape and structure. After the second rise, gently lift the dough using parchment paper or lightly floured hands. Carefully open the hot Dutch oven and quickly but gently lower the dough inside, being mindful of the high heat. If using parchment paper, you can place the entire sheet with the dough into the pot. This method prevents the dough from sticking and makes handling easier. Quickly cover the Dutch oven with its lid to retain the steam necessary for a crisp crust. This step is crucial for achieving an even bake and maintaining the dough’s rise and structure, leading to a beautifully baked loaf.
11. Baking Process: Time And Temperature
The baking process, including time and temperature, is crucial for achieving a perfectly baked loaf of bread. Once the dough is transferred to the preheated Dutch oven, bake it with the lid on at 450°F (230°C) for about 30 minutes. This high temperature and covered environment trap steam, which helps the dough rise fully and develop a beautiful crust. After 30 minutes, remove the lid to allow the crust to brown and become crisp, and continue baking for an additional 15-20 minutes. Keep an eye on the bread during this time to prevent overbrowning. The bread is done when it reaches a deep golden color and sounds hollow when tapped on the bottom. Proper time and temperature control ensure your bread will have a perfect crust and a soft, airy interior.
12. Checking Bread For Doneness
Checking bread for doneness is an important step to ensure your loaf is fully baked and has the right texture. Once the crust has turned a deep golden brown, carefully remove the bread from the Dutch oven using oven mitts. Tap the bottom of the loaf with your knuckles; it should sound hollow if it is done. Additionally, you can use an instant-read thermometer to check the internal temperature, which should be around 200°F (93°C) for a fully baked loaf. If the bread doesn’t sound hollow or the temperature is too low, return it to the oven for a few more minutes. Properly checking for doneness guarantees your bread will have a crispy crust and a fully cooked, soft interior.
13. Cooling The Baked Bread
Cooling the baked bread is an essential step that shouldn’t be rushed, as it significantly affects the final texture and flavor. Once the bread is done, carefully transfer it from the Dutch oven to a wire cooling rack. Allow the bread to cool completely for at least one to two hours. This cooling period lets the steam inside the bread escape, finishing the baking process and preventing a gummy texture. Cutting into the bread too soon can result in a dense and doughy interior. Patience during this stage ensures that the crumb structure sets properly, leading to a loaf with a perfect texture and taste. Cooling the bread thoroughly enhances its flavor and makes slicing easier, giving you the best possible homemade bread experience.
14. Storing And Serving
Storing and serving your bread properly ensures it stays fresh and delicious for as long as possible. Once the bread has cooled completely, store it in a bread box or wrap it in a clean, dry kitchen towel to maintain its crusty exterior while keeping the interior moist. Avoid storing bread in plastic bags, as they can make the crust soft and chewy. For longer storage, slice the bread and freeze it in an airtight container or freezer bag, where it can last for several weeks. When you’re ready to serve, simply thaw the slices at room temperature or toast them for a few minutes. Freshly baked bread is perfect for sandwiches, toast, or as a side with soups and salads. By storing and serving your bread correctly, you can enjoy its full flavor and texture over several days.
Conclusion
Baking bread in a Dutch oven is a profitable manner that transforms smooth factors right into a delicious, artisanal loaf. From selecting the right Dutch range and measuring substances appropriately to reading the kneading method and making sure proper fermentation, each step is crucial for attaining bakery-fine effects. The careful switch of dough, precise baking times, and thorough cooling in addition decorate the bread’s texture and taste. Proper garage ensures the bread remains fresh and a laugh for days. With workout and endurance, you can best the artwork of Dutch range bread baking, developing selfmade loaves which is probably every cute and delicious. Embrace the adventure, and enjoy the pleasure of baking your bread from scratch.