Baking home made bread is a deeply profitable enjoy, filling your property with irresistible aromas and turning in a loaf that’s fresh, flavorful, and freed from preservatives. One of the fine methods to attain bakery-exceptional bread at home is by the use of a Dutch oven. This versatile kitchen device creates the ideal environment for baking bread with a crispy crust and tender crumb. In this guide, we are able to walk you through each step of the process, from collecting elements to the very last bake, ensuring you could create delicious, crusty bread for your kitchen. Whether you’re a seasoned baker or a novice, this complete manual will help you grasp the artwork of baking bread in a Dutch oven.
1. Understanding the Basics
Understanding the basics of baking bread in a Dutch oven is vital for reaching the perfect loaf. A Dutch oven is good for bread baking due to the fact its heavy lid traps steam, growing a wet surroundings that allows the dough rise and increase a crispy, golden crust. The crucial additives for this technique are easy: flour, water, yeast, and salt shape the foundation, with non-compulsory additions like seeds, herbs, or dried quit end result to customize your bread. In addition to the Dutch oven itself, you’ll want some key device and gadget, together with blending bowls for combining factors, a kitchen scale for correct measurements, and distinctive necessities like a dough scraper and a proofing basket. By starting with those fundamentals, you positioned the level for a successful and interesting bread-baking enjoy.
2. Preparing the Dough
Preparing the dough is a important step in making bread, in which precision and approach extensively effect the very last product. Accurate size of additives is important in baking to make sure the proper balance of flour, water, yeast, and salt. Using a kitchen scale for those measurements ought to make a large difference in consistency and exquisite. Once the additives are measured, blending the dough properly is the following essential step. Combine the additives in a mixing bowl, stirring till they shape a cohesive mass.
Kneading is then required to increase the gluten, which offers the bread its shape and chewiness. This can be finished through hand, the use of a push-fold-flip movement, or with a mixer prepared with a dough hook. Knead till the dough becomes smooth and elastic, indicating it is prepared for the subsequent diploma. By paying near hobby to those information, you ensure your dough is properly-prepared for a a fulfillment rise and bake.
3. First Rise (Bulk Fermentation)
The first rise, or bulk fermentation, is a crucial phase in bread making where the dough develops flavor and structure. For optimal fermentation, let the dough rise in a warm, draft-free area. The ideal temperature range is around 75-80°F (24-27°C). Timing is important; typically, the dough should rise for 1 to 2 hours, or until it has doubled in size.
During this time, folding and turning the dough can enhance its strength and elasticity. Gently stretch and fold the dough over itself a few times during the rise, usually at 30-minute intervals. This process helps to redistribute the yeast and gas bubbles, leading to a more even crumb and better oven spring. By carefully managing the first rise, you set the foundation for a well-structured and flavorful loaf of bread.
4. Shaping the Dough
Shaping the dough is a key step in preparing it for baking, ensuring the final loaf has the desired structure and appearance. Start with pre-shaping, which involves gently forming the dough into a rough ball or log, depending on the final shape you aim to achieve. This initial shaping helps to create surface tension and organize the gluten network. After pre-shaping, let the dough rest for about 10-15 minutes to relax and become easier to handle.
For the final shaping, refine the dough into its intended form, whether it’s a round boule or an elongated batard. Use gentle but firm motions to shape the dough, creating a taut surface without deflating it. After shaping, let the dough rest again, covered, for a final rise known as proofing. This resting period allows the dough to expand and develop further, setting the stage for a successful bake. Proper shaping and resting ensure your bread will rise well in the oven and have a beautiful, even crumb.
5. Second Rise (Proofing)
The second rise, or proofing, is the final step before baking, and it’s crucial for developing the dough’s final volume and texture. Creating the right environment for proofing involves ensuring a warm, draft-free area with consistent humidity, typically around 75-80°F (24-27°C). This encourages the dough to rise evenly and reach its full potential. Timing is essential; the dough is ready to bake when it has nearly doubled in size and is slightly springy to the touch.
Over-proofing can cause the dough to collapse, while under-proofing results in dense bread. Before baking, scoring the dough is an important step. Using a sharp blade, make shallow cuts on the surface of the dough. These scores allow the bread to expand in a controlled manner during baking, preventing random splits and enhancing the loaf’s appearance. By carefully managing the proofing stage, you ensure your bread will have a beautiful rise and a perfect crumb structure.
6. Preparing the Dutch Oven
Preparing the Dutch oven is a important step to make certain your bread bakes flawlessly. Preheating the Dutch oven is important because a warm baking vessel allows create the steam vital for a crispy crust and a nicely-risen loaf. Place the Dutch oven with its lid on in the oven and preheat it to the desired baking temperature, commonly around 450°F (230°C).
Using parchment paper makes moving the dough into the recent Dutch oven much easier and more secure. Shape your dough on a bit of parchment paper, then use the paper to raise and decrease the dough into the preheated pot. Safety is paramount when dealing with a hot Dutch oven. Always use thick oven mitts to guard your palms, and be careful when removing the lid to avoid steam burns. By preheating the Dutch oven, the usage of parchment paper, and following protection precautions, you place the degree for a a hit and exciting baking revel in.
7. Baking the Bread
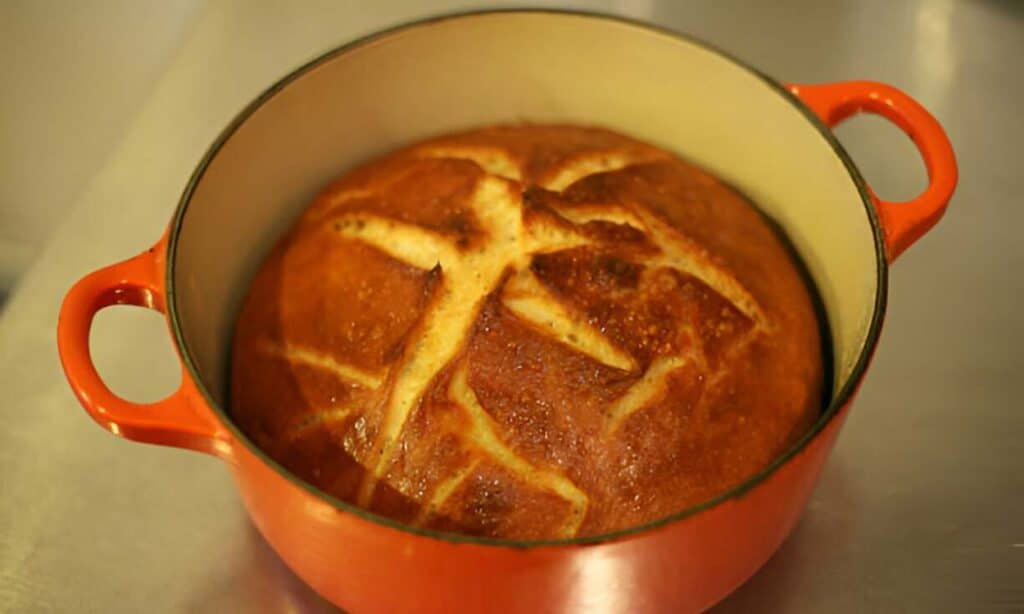
Baking the bread in a Dutch oven involves a few critical steps to ensure the best results. Start by carefully placing the dough into the preheated Dutch oven using the parchment paper to lift and lower it gently, avoiding any burns or mishaps. The optimal baking time and temperature are crucial; typically, you should bake the bread at 450°F (230°C) for about 30 minutes with the lid on, followed by an additional 15-20 minutes with the lid off.
The Dutch oven’s lid traps steam released from the dough, which is essential for developing a crispy, golden crust. This steam keeps the dough’s surface moist, allowing it to expand fully before forming the crust. Removing the lid at the right time is equally important; doing so allows the crust to brown and crisp up. Timing this correctly ensures the bread has a beautiful, well-developed crust while the interior remains soft and airy. By following these steps, you can achieve a perfectly baked loaf with a crusty exterior and tender crumb.
8. Cooling and Slicing
Cooling and reducing your bread well are crucial steps to ensure the quality texture and flavor. Allowing the bread to chill completely is essential as it shall we the indoors finish cooking and stabilizes the crumb shape. Cutting into warm bread can reason it to become gummy or misshapen. Once the bread is fully cooled, use a serrated bread knife to slice it, making use of mild, sawing motions to keep away from compressing the loaf.
This approach preserves the bread’s ethereal texture and guarantees even slices. For storing bread, the great exercise is to maintain it at room temperature in a bread field or wrapped in a material to preserve its crust whilst maintaining the interior wet. Avoid storing bread in plastic, as it is able to make the crust soggy. If you need to preserve bread for longer intervals, don’t forget freezing it, ensuring it is properly-wrapped to prevent freezer burn. By cooling, slicing, and storing your bread correctly, you could enjoy it at its fine for days.
9. Troubleshooting Common Issues
Troubleshooting commonplace problems in bread baking assist you to reap continually outstanding consequences. A dense loaf regularly consequences from insufficient kneading, incorrect rising instances, or no longer enough moisture within the dough. Ensure you’re kneading the dough till it is easy and elastic, permitting it to upward thrust absolutely at some stage in each fermentation tiers, and the use of the right quantity of water.
A burnt crust may be prevented by means of adjusting the oven temperature or baking time, and you may want to lower the temperature barely or cover the bread with foil for the final baking minutes. Flatbread usually shows problems with yeast pastime or fallacious proofing. Ensure your yeast is clean and active, and provide the dough with a warm, draft-loose environment for rising. If the dough overproofs, it could crumble, so watch the timing cautiously. By addressing those issues, you may improve your bread’s texture, appearance, and overall first-class.
Conclusion
Making bread in a Dutch oven is a rewarding and exciting system that consequences in a scrumptious, crusty loaf. By understanding the basics, making ready the dough efficaciously, and carefully handling every step—from the primary upward push to the final bake—you may reap bakery-high-quality bread at domestic. Paying interest to info consisting of preheating the Dutch oven, the use of proper kneading and shaping strategies, and ensuring premiere proofing situations can considerably beautify your outcomes. Troubleshooting common problems and following pleasant practices for cooling, cutting, and storing will assist keep the fine of your bread. With staying power and practice, you can grasp the art of Dutch oven bread baking and enjoy sparkling, selfmade bread every time you want.