Cleaning a Dutch oven well is critical for maintaining its functionality and longevity, whether or no longer it’s made from solid iron, enameled, or stainless-steel. Each material requires specific care to ensure that it remains in top situation, prepared to address anything from sluggish-cooked stews to freshly baked bread. In this manual on “How to Clean a Dutch Oven,” we’re going to cover the quality strategies for eliminating difficult stains and food residue, retaining the brilliant of your cookware, and ensuring it stays a centerpiece in your culinary adventures. Whether you’re a pro chef or a domestic prepare dinner, the ones tips will assist you keep your Dutch oven in pristine condition.
1. Types of Dutch Ovens
Dutch ovens come in various materials, each offering unique benefits and requiring specific care. Understanding these differences can help you maintain your cookware effectively and ensure its longevity.
Cast Iron: Known for its superior heat retention and even cooking, cast iron Dutch ovens are a favorite among outdoor cooks and home chefs alike. These pots are ideal for searing meat, slow-cooking stews, and even baking bread. The downside is that they are prone to rust if not properly maintained. Cleaning a cast iron Dutch oven involves rinsing it with hot water and using a brush to remove food particles. Avoid using soap as it can strip the seasoned coating that builds up over time and enhances the pot’s non-stick properties.
Enameled: Enameled Dutch ovens offer the same heat distribution and cooking qualities as cast iron but come with a smooth, non-reactive surface that makes them easier to clean and maintain. They don’t require seasoning and are resistant to acidic foods, which can damage traditional cast iron. To clean an enameled Dutch oven, use warm, soapy water and a soft sponge to avoid scratching the enamel surface.
Stainless Steel: Stainless steel Dutch ovens are lighter than cast iron and are incredibly resistant to rust and corrosion. They do not retain heat as well as cast iron but are much easier to maintain. These are perfect for those who prefer a lighter pot or cook acidic foods frequently. Cleaning a stainless steel oven is straightforward—simply use warm, soapy water and a non-abrasive sponge, and you can keep it sparkling with minimal effort.
2. Why Proper Cleaning is Crucial
Ensuring that this oven is wiped clean and cared for after each use dramatically extends its existence. Residues from cooking can harden and become an increasing number of difficult to take away, probably causing harm over the years. Additionally, for forged iron varieties, leftover moisture or food particles can lead to rust, which weakens the iron and ruins the cookware’s pro surface. By automatically cleansing your Dutch oven, you prevent those issues, saving your self the value and inconvenience of untimely replacements.
2. Daily Cleaning Techniques:
1. For Cast Iron Dutch Ovens
After each use, let your cast iron Dutch oven cool slightly before cleaning. Avoid using cold water on a hot pot as it can cause the iron to crack. Clean the oven using a soft sponge and warm water. It’s important not to use soap or harsh detergents, which can strip the seasoning off the surface. If food particles are stuck, simmer some water in the pot for a few minutes to loosen them. Dry the Dutch stove thoroughly with a towel and place it on a warm stove to evaporate any remaining moisture. This process prevents rust and ensures the longevity of your cast iron cookware.
2. For Enameled Dutch Ovens
Enameled Dutch ovens are easier to clean due to their smooth surface. Use gentle cleaning methods to preserve the enamel and prevent chipping. A soft sponge or a nylon brush with warm, soapy water is usually sufficient. Avoid using abrasive pads or harsh chemicals that can damage the enamel. After washing, rinse with warm water and dry completely to maintain its pristine condition. Regular gentle cleaning keeps enameled Dutch ovens looking new and ready for your next culinary adventure.
3. For Stainless Steel Ovens
Stainless steel Dutch ovens are the easiest to maintain due to their robust nature. You can safely use a variety of cleaning agents without worrying about damaging the surface. For daily cleaning, warm soapy water and a non-abrasive sponge or cloth will do the job. For tougher stains, you can use a mild abrasive cleaner or a vinegar solution to restore its shine. Always rinse thoroughly and dry to prevent water spots and maintain the luster of the stainless steel.
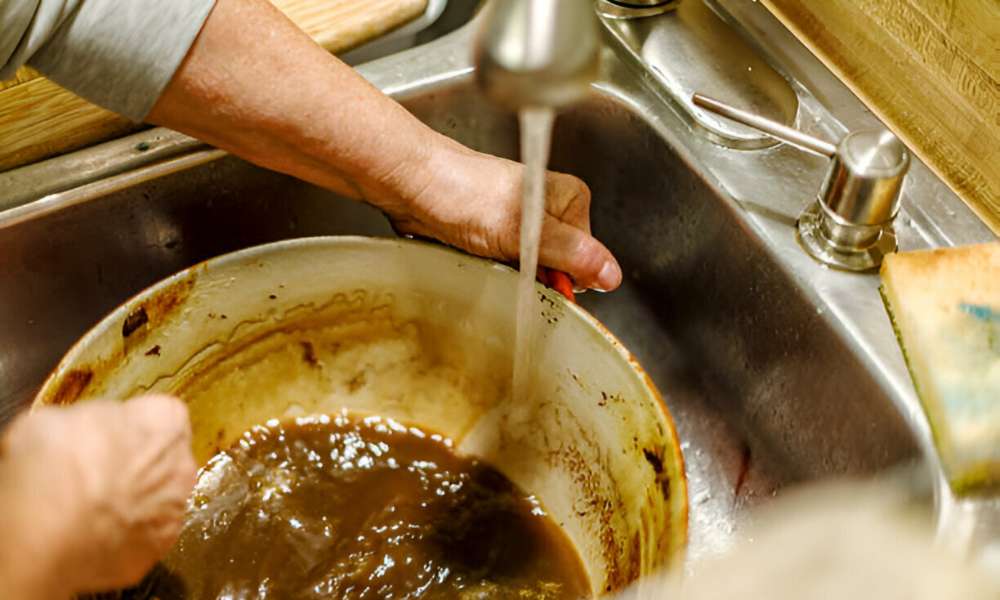
4. Dealing with Tough Stains and Residue:
1. For Cast Iron
Coarse Salt: Begin by warming the Dutch oven slightly on the stove to loosen the stuck-on food. Then, sprinkle a generous amount of coarse salt into the pot. The abrasive texture of the salt helps scrub away the tough stains without scratching the cast iron. Use a paper towel or a soft cloth to rub the salt against the stains in a circular motion. This method is particularly effective for removing food particles and residues that are not too deeply ingrained.
Cooking Oil: Once the majority of the residue has been loosened by the salt, add a few tablespoons of cooking oil to the Dutch oven. The oil serves to lift any remaining food particles and also helps in re-seasoning the surface of the cast iron. Using a soft brush or cloth, scrub the oil into the surface; this not only cleans but also maintains the seasoning of your Dutch stove.
Water: After scrubbing with salt and oil, rinse the Dutch oven with warm water. Avoid using soap if possible, as it can strip the seasoning from the cast iron. If water alone does not remove all the oil, you can heat the Dutch stove on the stove to evaporate any excess moisture and help in further seasoning the metal.
2. For Enameled
Baking Soda: Start by making a paste with baking soda and a little water. This mild abrasive is excellent for removing tough stains without damaging the enamel. Apply the paste directly onto the stained areas and let it sit for 15-20 minutes. Then, using a soft sponge, gently scrub the stains in a circular motion. The natural cleaning properties of baking soda will help lift stains without scratching the surface.
White Vinegar: For more stubborn stains or discoloration, white vinegar can be your next line of defense. After rinsing out the baking soda, coat the stained area with white vinegar. The acidity of the vinegar helps to break down food residues and brighten the cookware. Allow it to sit for 5-10 minutes, then gently scrub it with a soft sponge. This method is particularly effective for dealing with residual odors and lightening dark stains.
Mild Dish Soap: Once the baking soda and vinegar have done their job, wash the Dutch oven with mild dish soap and warm water to remove any remaining cleaning residue. Use a soft cloth or sponge to wash the interior and exterior gently. Rinse thoroughly with warm water to ensure all soap is removed, as any residue can affect the flavor of your food.
3. For Stainless Steel
Enamel-Specific Commercial Cleaners: These are excellent for removing stains without damaging the surface of stainless steel Dutch ovens. Choose a cleaner specifically formulated for enamel-coated or stainless steel surfaces to ensure it won’t be too harsh. Apply according to the manufacturer’s instructions, typically by applying the cleaner, letting it sit for a few minutes, and then scrubbing gently with a non-abrasive pad.
Vinegar: To address hard water stains or to restore shine, white vinegar is highly effective. Soak a cloth in white vinegar and wipe the exterior of the Dutch oven, focusing on stained areas. The natural acidity helps to break down buildup without harming the stainless steel finish. For persistent spots, a vinegar soak before scrubbing can loosen grime, making it easier to clean.
Baking Soda: For scrubbing away food residue without scratching the surface, baking soda is ideal. Then make a paste of baking soda and water, apply it to the stubborn stains, and let it sit for about 15-20 minutes. Use a soft sponge to gently scrub the area in a circular motion. Baking soda’s mild abrasive properties help remove stuck-on food without damaging the finish.
Mild Dish Soap: Regular cleaning with mild dish soap and warm water can prevent residue buildup and maintain the cookware’s appearance. It’s gentle enough to use after every use but effective enough to keep your Dutch stove clean and ready for its next use. Always rinse thoroughly to prevent soap residue from affecting your dishes’ flavors.
5. Seasoning Your Cast Iron Dutch Oven
The purpose of seasoning is to create a natural, non-stick coating on the iron by baking oil into the surface. This layer not only makes cooking and cleaning easier but also protects the iron from moisture that can lead to rust. To season your Dutch oven, start by thoroughly cleaning it with warm water and a brush to remove any residue. Dry it completely to prevent rusting.
Next, apply a thin layer of a high-smoke point oil, such as canola or vegetable oil, over the entire surface, inside and out. Wipe off any excess oil with a paper towel to avoid a sticky finish. Finally, place the Dutch oven upside down in a preheated oven at around 375°F (190°C) for one hour. Allow it to cool in the oven. This process bakes the oil into the iron, forming a protective and easy-release surface. Repeat this seasoning process periodically to maintain the optimal performance of your cast iron Dutch stove.
6. Storing Your Dutch Oven
The perfect storage conditions for a Dutch range contain a cool, dry vicinity with controlled temperature and humidity. These situations assist prevent the steel from experiencing hot temperature changes that might motive the fabric to make bigger or contract, probably leading to damage over the years.
To further guard your Dutch oven towards rust and other kinds of damage, remember whether to keep it with the lid on or off. If you select to keep it with the lid on, area a paper towel or a clean material between the lid and the pot to permit air move and absorb any residual moisture. This simple step enables save you the formation of rust, in particular in solid iron Dutch ovens. Alternatively, storing the Dutch range with the lid off also can make sure correct air move, that’s vital for preserving the oven dry.
Additionally, placing wooden blocks or paper towels in the oven can assist take in any extra moisture which can gather, particularly in extra humid environments.
7. Special Considerations
To repair rusted Dutch stove, start via scrubbing the rusted areas with metal wool or a stiff brush to remove as a whole lot rust as viable. Afterward, wash the pot with heat, soapy water to smooth out any particles. Rinse and dry the Dutch variety thoroughly. Then, re-season the pot via coating it with a thin layer of cooking oil, wiping off the more, and baking it in a preheated oven at 375°F for approximately an hour.
Allow it to cool inside the oven. This method need to assist repair the protecting layer that forestalls destiny rust. To reduce cleansing trouble at the same time as the usage of your Dutch oven, consider enforcing cooking practices collectively with the usage of liners and limitations. Silicone, parchment paper, or even aluminum foil liners may be located within the oven while cooking ingredients which are probable to paste or leave residue.
These liners act as barriers that prevent food from coming into direct touch with the floor of the Dutch range, thereby minimizing the need for vast cleansing publish-cooking. Not only do they maintain your Dutch range cleaner, however moreover they extend the lifestyles of the seasoning thru lowering publicity to harsh food acids and moisture.
Conclusion
Properly cleansing and keeping your Dutch oven is not just about preserving its look; it’s approximately extending its functionality and lifespan. Whether you personal a cast iron, enameled, or chrome steel Dutch stove, each kind requires unique care to ensure it stays a reliable cooking tool. By following the daily cleaning strategies and addressing any rust troubles directly, you may maintain your Dutch oven in pinnacle circumstance. Moreover, imposing preventive garage measures and the usage of cooking liners can drastically lessen put on and tear, making your Dutch stove less complicated to hold over the years. Embrace those practices to make certain that your Dutch range keeps to serve you nicely, assisting you create infinite delicious food for future years.