A Dutch oven, a undying staple in the kitchen, is famend for its sturdiness and flexibility. This heavy, thick-walled pot, commonly made from solid iron or enameled solid iron, is essential for each beginners and pro chefs alike. Its capability to hold warmth makes it wonderful for severa cooking techniques, from baking and braising to simmering and roasting. In this guide, we’re able to find out a manner to maximise the capability of your Dutch oven, defensive everything from the initial preference and steering to cooking techniques that allows you to decorate your culinary repertoire. Whether you are baking crusty bread, simmering hearty stews, or making prepared a mild roast, this oven can deal with it all, making it a valuable and crucial device on your kitchen arsenal.
2. Choosing the Right Dutch Oven
Selecting the proper Dutch oven is vital to making sure it meets your cooking wishes and choices. The number one sorts of Dutch ovens include solid iron and enameled forged iron. Traditional cast iron is nicely-loved for its wonderful warmth retention and sturdiness, perfect for long-cooking stews and braising meats.
Enameled cast iron, alternatively, gives the same warmth retention with the brought benefit of a non-reactive floor, making it appropriate for cooking acidic ingredients without the hazard of taste alteration. When selecting this oven, take into account the size; a fashionable 5-7 quart pot is flexible sufficient for most household recipes, however large households or unique might necessitate a larger size.
Weight is some other vital element, as a heavier pot presents better heat retention however can be greater tough to handle. Lastly, recollect legitimate brands recognized for their best and durability. Investing in a great oven can increase your cooking enjoy and offer a device that lasts for generations.
3. Seasoning and Prepping
Proper seasoning and instruction are crucial for buying the maximum from your Dutch oven. For a cast iron oven, seasoning includes developing a protecting layer that prevents rust and gives a herbal non-stick surface. Start by way of washing this oven with warm water and mild soap to take away any manufacturing facility residue, then very well dry it. Apply a skinny layer of vegetable oil or melted shortening to the entire surface, each interior and out.
Place this oven the other way up in an oven preheated to 375°F (a hundred ninety°C), with a sheet of aluminum foil on the decrease rack to trap any drips. Bake it for approximately an hour, then let it cool within the oven. This method may also need to be repeated some times to accumulate a good layer of seasoning.
For an enameled oven, the guidance is easier since it doesn’t require seasoning. Before the first use, wash it with heat, soapy water and rinse thoroughly. Make sure to keep away from the usage of abrasive cleaners or scouring pads that could harm the enamel coating.
After washing, it is prepared to use—simply make sure you comply with the producer’s guidelines to prevent chipping or cracking the teeth. Proper training ensures that each types of Dutch ovens perform nicely and have an extended lifespan, making them imperative gear in your kitchen.
4. Basic Cooking Techniques
Mastering the simple cooking techniques with this oven can drastically enhance your culinary repertoire. This flexible kitchen tool excels in numerous cooking strategies:
Baking: Dutch ovens are perfect for baking due to their first-rate warmness retention. The enclosed area and heavy lid create an oven-like environment this is ideal for making bread with a crispy crust and moist indoors. They can also be used to bake cakes that pop out frivolously cooked with a brilliant texture.
Braising: This technique includes first searing meat or veggies at a excessive temperature after which cooking them slowly in a small amount of liquid. The Dutch oven’s tight-becoming lid traps moisture interior, making it ideal for braising, because it continues the meat gentle and flavorful.
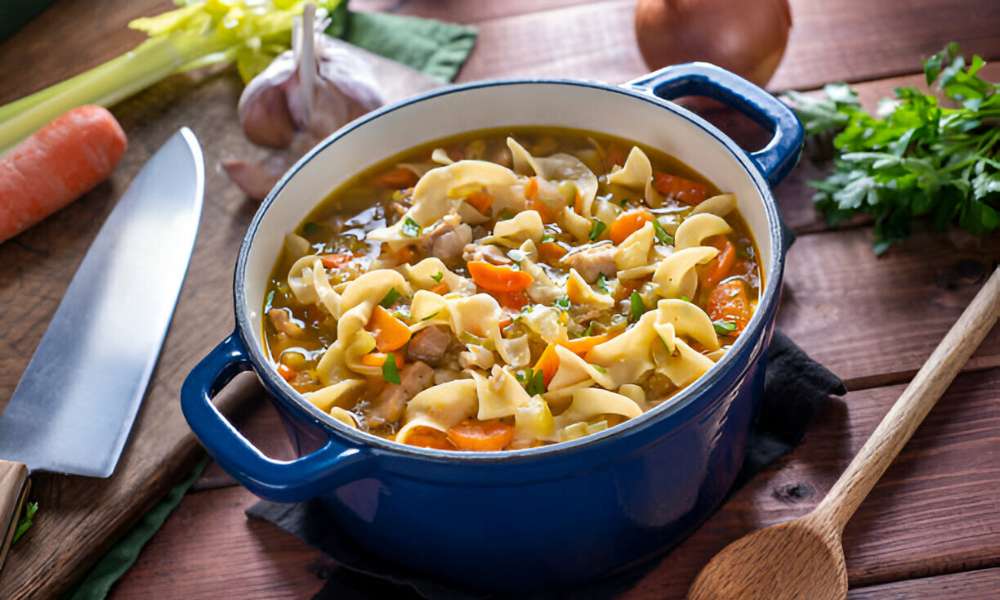
Simmering: Dutch ovens distribute warmth calmly, which makes them tremendous for simmering soups and stews. The gradual cooking system lets in flavors to meld superbly, and the steady temperature enables to cook the entirety thoroughly with out the chance of sizzling that can happen with thinner pots.
By utilizing those techniques, you may use your Dutch oven to put together a wide range of dishes, from savory stews and soft braised meats to artisanal breads and delicate desserts, all with exquisite taste and texture.
5. Temperature Control and Heat Distribution
Effective temperature manage and warmth distribution are secret to meaking the maximum of your Dutch oven’s talents. For stovetop use, it is vital first of all medium warmness to heat this oven step by step, heading off fast temperature adjustments which can damage the cloth, in particular in cast iron fashions.
Once heated, you may adjust the temperature according to the cooking procedure, whether you’re searing meat or simmering a stew. The thick partitions of this oven will maintain and distribute the heat calmly, making sure that your food cooks uniformly. When the use of this oven in an oven, preheat it with the oven to keep away from thermal surprise. This gradual heating enables maintain the integrity of the Dutch range even as also offering a stable cooking surroundings.
This oven’s capacity to keep heat is beneficial for long, gradual roasts or baking, as it minimizes fluctuations in oven temperature. When baking bread, putting the lid on the Dutch range traps steam inner, which contributes to developing a perfect crust. By understanding and coping with how your Dutch oven reacts to extraordinary temperatures, you could attain consistent and scrumptious effects in all your dishes.
6. Cleaning and Maintenance
Proper cleaning and maintenance are crucial to preserving the functionality and appearance of your Dutch oven, whether it’s cast iron or enameled. For cast iron Dutch ovens, avoid using soap as it can strip the seasoning. Instead, clean it while still warm using hot water and a brush or sponge to remove food particles. If needed, use a paste of coarse salt and water for stubborn residue. After washing, dry the Dutch stove thoroughly to prevent rust, then apply a light coat of oil to protect the seasoning.
Enameled Dutch ovens are less maintenance-intensive. They can be cleaned with soapy water and a soft sponge. However, avoid using abrasive pads or harsh chemicals that could damage the enamel surface. For tough stains, soaking in warm, soapy water before cleaning can be helpful. Regardless of the type, always ensure the Dutch stove is completely dry before storing it.
7. Advanced Tips and Tricks
Expanding your culinary talents with a Dutch oven consists of exploring its use in out of doors settings and trying specialized cooking strategies. For out of doors cooking, which includes camping or cooking over an open fireside, a Dutch variety is pretty well-appropriate because of its rugged manufacturing and functionality to distribute warmth gently. It may be used to cook dinner dinner dinner right now over coals or tucked proper right into a campfire, in which it excels at making one-pot food that feed a crowd, like stews, chili, or perhaps cobblers.
In your home kitchen, embody the paintings of sluggish cooking together together with your Dutch oven. It’s remarkable for recipes that benefit from a long, slight cooking time, which consist of braises, soups, and stews, which extend deep flavors as they simmer. Additionally, strive no-knead bread, a well-known recipe that showcases the Dutch variety’s capability to create an artisan-style crusty loaf.
This method consists of letting the dough upward push slowly, then baking it in a preheated Dutch oven to acquire a expert bakery-incredible crust. These superior tips and guidelines will assist you free up the overall capability of your Dutch stove, improving your cooking repertoire with each conventional and modern dishes.
8. Common Mistakes to Avoid
When using a Dutch oven, sure pitfalls can have an effect on its performance and sturdiness, so it is essential to have in mind of these common errors. One of the key mistakes to avoid is overheating or exposing your Dutch stove to surprising temperature changes. For example, putting a cold Dutch stove on a hot burner or in a preheated oven can reason solid iron to crack and harm tooth finishes. Always allow the pot to gradually come to a temperature to save you these troubles.
Additionally, incorrect cleansing strategies can also shorten the lifespan of your Dutch stove. For cast iron, keep away from the use of cleaning soap and abrasive scrubbers as they are able to strip away the seasoning. Instead, opt for warm water and a stiff brush. For enameled surfaces, chorus from the usage of steel utensils or abrasive cleaners that can scratch or chip the tooth. Always dry your Dutch oven very well after washing to prevent rust and keep it nicely. Adhering to these pointers will ensure your Dutch range stays a loved kitchen device for years to come.
Conclusion
Mastering using a Dutch oven can drastically increase your cooking by using permitting you to tap into a number of strategies from baking and braising to simmering and roasting. Whether you’re cooking indoors or out, this versatile kitchen device offers a completely unique blend of sturdiness and functionality which can cope with an impressive array of dishes. By selecting the proper kind, keeping proper temperature manage, and adhering to accurate cleansing and preservation practices, you ensure that your Dutch range stays in pinnacle situation. Remember the superior tips and common pitfalls to keep away from, and also you’ll be properly to your way to making the maximum of this culinary classic. Embrace the full capacity of your Dutch stove and let it inspire you to create hearty, flavorful food which can be sure to delight you.