Cooking with a Dutch oven while camping is a rewarding experience that combines the joy of outdoor adventures with delicious, hearty meals. Known for its versatility and durability, a Dutch oven is an essential tool for campfire cooking, allowing you to prepare everything from stews and roasts to freshly baked bread. Whether you’re a seasoned camper or new to outdoor cooking, mastering the use of a Dutch oven can elevate your camping cuisine to a whole new level. In this guide, we’ll explore how to choose the right Dutch oven, essential tools, and techniques to help you cook like a pro in the great outdoors.
1. Choosing the Right Dutch Oven for Camping
Choosing the right Dutch oven for camping is crucial to ensure you have the best cooking experience outdoors. When selecting a Dutch oven, consider the size based on your group’s needs—typically, a 10- to 12-inch Dutch stove is ideal for most camping trips. Material is also important; cast iron is the go-to choice for camping due to its excellent heat retention and durability.
Camping-specific Dutch ovens often feature legs on the bottom and a flat lid with a rim, allowing you to place coals on top for even cooking. These features make them distinct from regular Dutch ovens, which are better suited for kitchen use. By selecting the right oven, you’ll be well-prepared to cook a variety of meals while enjoying the great outdoors.
2. Essential Tools and Equipment
Key tools include a lid lifter for safely handling the hot lid, tongs for managing coals and food, and heat-resistant gloves to protect your hands from high temperatures. A trivet is useful for setting this oven on uneven ground or for cooking directly over coals.
A charcoal chimney starter is invaluable for quickly and evenly lighting your charcoal, ensuring consistent heat for cooking. Additionally, consider bringing a portable table and a fire-resistant mat to create a safe and convenient cooking area. With these essential tools and gear, you’ll be well-equipped to enjoy hassle-free Dutch stove cooking in the great outdoors.
3. Setting Up Your Dutch Oven for Cooking
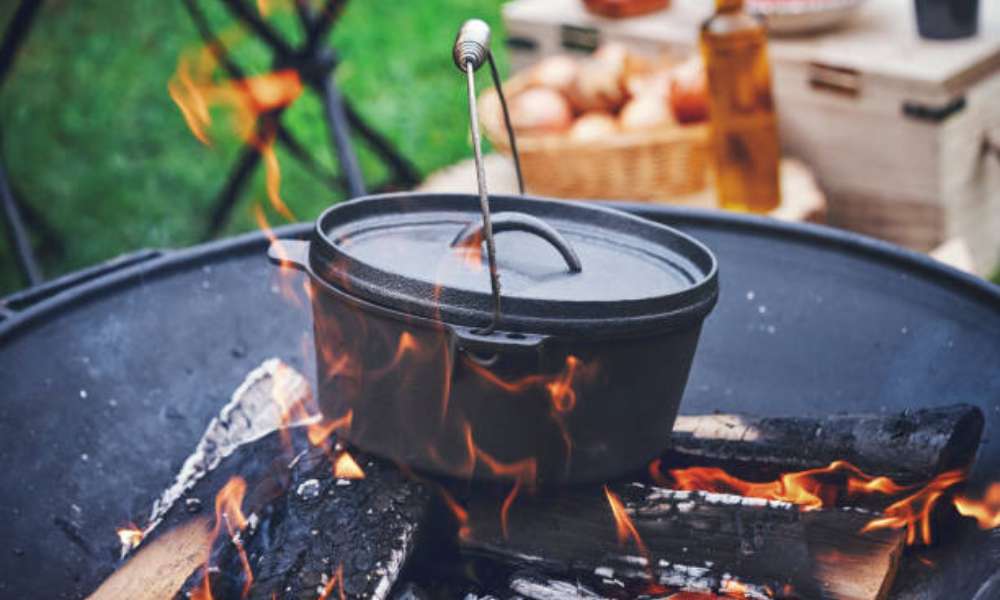
Setting up your Dutch oven for cooking while camping requires careful preparation to ensure even and controlled cooking. Start by choosing a stable, flat surface for your campfire or charcoal setup. If using a campfire, create a bed of hot coals, and if using charcoal, light them in a chimney starter for even heat distribution.
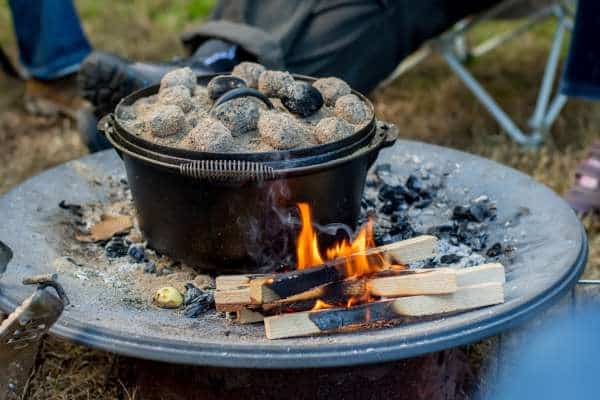
Place your Dutch stove over the coals or charcoal, making sure to position it on a trivet or directly on the legs if this oven has them. For optimal temperature control, place coals both underneath and on top of the lid, adjusting the number based on the desired cooking method—fewer coals for slow simmering and more for baking or roasting.
By managing the heat and positioning of this oven carefully, you can achieve consistent results even in the unpredictable conditions of the outdoors.
4. Basic Cooking Techniques for Camping
Mastering basic cooking techniques with a Dutch oven while camping can significantly enhance your outdoor culinary experience. This oven allows for a variety of cooking methods, including baking, roasting, simmering, and frying, making it an incredibly versatile tool.
For baking, place more coals on the lid than underneath to create an oven-like environment. For roasting, balance the coals evenly above and below the oven to achieve a perfectly cooked dish. Simmering requires fewer coals placed mainly underneath to maintain a gentle, steady heat. Frying is best done with coals directly beneath the stove, ensuring the oil heats evenly.
To achieve consistent results, regularly rotate this oven and lid to avoid hot spots, and adjust the number of coals based on wind conditions and ambient temperature. These techniques will help you cook delicious meals, no matter where your camping adventures take you.
5. Easy Camping Recipes for Dutch Oven Beginners
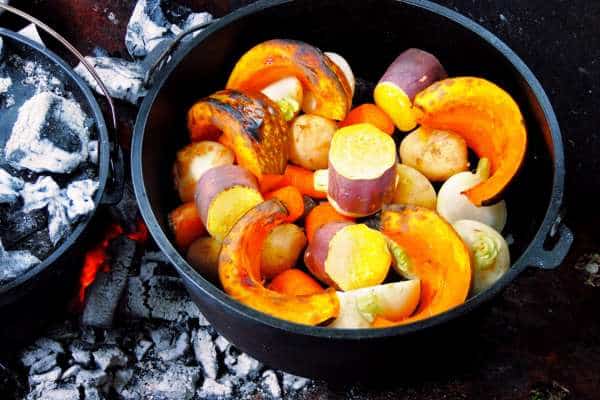
For Dutch oven beginners, easy camping recipes like stews, cobblers, and one-pot meals are perfect starting points. These dishes are simple to prepare and require minimal ingredients, making them ideal for outdoor cooking.
A classic beef stew is a great example—start by browning the meat, then add vegetables, broth, and seasoning. Cover the Dutch stove and let it simmer over low heat for about 1.5 to 2 hours, ensuring the coals are evenly distributed underneath.
For a dessert, try a fruit cobbler by layering your favorite canned fruit with cake mix, then baking with coals on top and underneath for 30-45 minutes until golden brown. One-pot meals like chili or pasta are also excellent choices, as they require little effort and offer hearty flavors.
6. Advanced Dutch Oven Camping Recipes
For those ready to take their Dutch stove camping skills to the next level, advanced recipes like baking bread, roasting a whole chicken, or making pizza offer a satisfying challenge. Baking bread in a Dutch oven requires precise heat control—place more coals on the lid to create an oven-like environment, and rotate the stove frequently for even baking.
Roasting a whole chicken is equally rewarding; start by searing the chicken on all sides, then cook with coals both under and on top, adjusting the coals to maintain a consistent heat. Making pizza outdoors is another exciting option—use fewer coals underneath and more on top to mimic a pizza oven’s high heat, ensuring a crispy crust.
For those cooking multiple dishes simultaneously, stack Dutch ovens of different sizes, with the heat from the lower one helping to cook the upper. These advanced techniques will not only impress your fellow campers but also expand your outdoor cooking repertoire.
7. Caring for Your Dutch Oven While Camping
Caring for your Dutch stove while camping is essential to keep it in top condition for future adventures. After each use, allow this oven to cool slightly before cleaning. For cast iron Dutch ovens, avoid using soap; instead, scrub the interior with a brush or scraper and warm water to remove food residue.
Dry the oven thoroughly to prevent rust, and apply a light coat of vegetable oil to maintain its seasoning. For enameled Dutch ovens, mild soap and a non-abrasive sponge can be used, but make sure to rinse and dry completely. During your camping trip, store thisstove in a dry, cool place, ideally in a carrying bag to protect it from the elements. After your trip, re-season the cast iron if needed and store it with the lid slightly ajar to allow air circulation.
8. Safety Tips for Using a Dutch Oven While Camping
Safety is paramount when using a Dutch stove while camping, especially when handling hot coals. Always use heat-resistant gloves to protect your hands when lifting the lid or moving this oven. A lid lifter or sturdy tongs are essential tools for safely managing hot coals and adjusting the position of this stove.
When cooking in windy conditions, be cautious of flying sparks and ensure the campfire area is clear of flammable materials. In rainy weather, keep your Dutch stove covered as much as possible to maintain consistent heat and prevent water from entering the pot. It’s also important to set up your cooking area on stable, flat ground to avoid accidents.
9. Troubleshooting Common Camping Cooking Issues
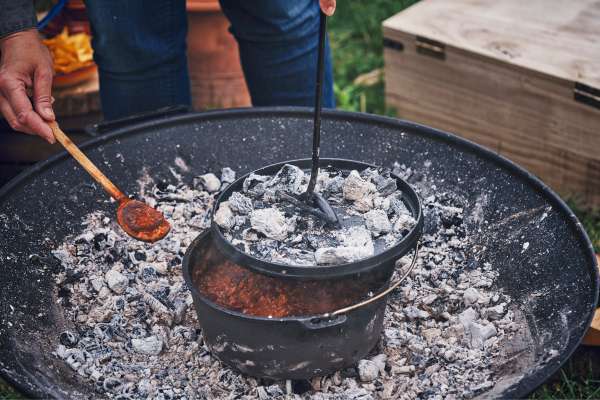
Uneven cooking often results from inconsistent heat distribution, so try rotating the Dutch stove and lid regularly to promote even heating. Managing temperature control is crucial; use more coals for higher heat and fewer coals for simmering, adjusting as needed based on the weather.
Wind can cause coals to burn faster, so shield your cooking area with a windbreak, and in rainy conditions, keep this oven covered to retain heat. To prevent food from sticking or burning, make sure this stove is properly seasoned and preheated before adding ingredients. Stir occasionally and monitor the heat closely to avoid scorching.
10. Tips for Packing and Transporting Your Dutch Oven
Start by choosing a sturdy carrying case or bag that’s specifically designed for Dutch ovens, which will protect it from damage during transport. To prevent scratches or dents, place a thick towel or padding inside the bag around the oven. Store the lid separately or inside this stove, using a cloth to prevent it from rattling.
Include essential accessories like a lid lifter, tongs, and heat-resistant gloves in the same bag for easy access. When packing, keep this oven in a secure spot in your vehicle to prevent it from shifting. Upon arrival at the campsite, have a dedicated area for your Dutch stove and tools, making setup and cleanup more efficient.
Conclusion
Mastering using a Dutch stove whilst camping can increase your outdoor cooking experience, turning easy elements into scrumptious, hearty food. By choosing the right oven, the usage of crucial equipment, and following right cooking techniques, you could revel in the versatility and reliability this cookware gives. Whether you’re getting ready a basic stew or tackling greater superior recipes, this range proves to be an necessary companion on your camping adventures. With the proper care and protection precautions, this range will serve you nicely for years yet to come, making each tenting journey a culinary delight.