Enjoying A refreshing, Icy slushie on A hot summer day is one of life’s simple pleasures. But what if you don’t have a blender, The conventional kitchen appliance used to make this delightful treat? Fortunately, The absence of A blender doesn’t mean you have to miss out on homemade slushies. With A little creativity, Patience, And some household items, You can whip up your favorite slushie flavors at home.
In this guide, We’ll explore three different methods: the Plastic Bag Method, The Freezer Method, And the Ice Cube Tray Method. These innovative techniques bypass the need for A blender, Proving that nothing should stand between you And A delicious, Frosty slushie. Let’s delve into these methods And learn how to make your slushie without A blender.
What Is Slushie?
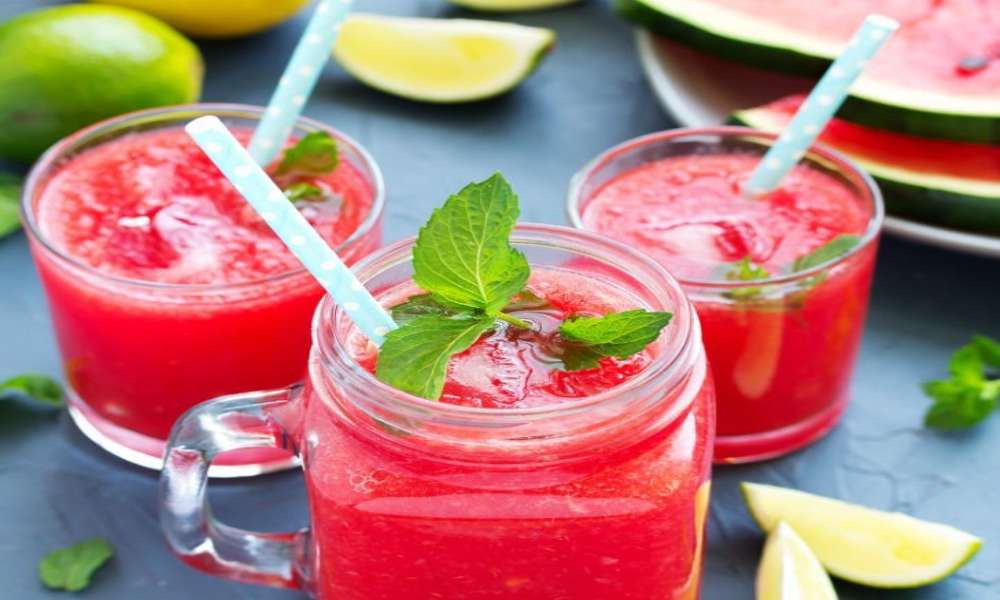
A slushie is A popular frozen beverage typically made by blending ice with various flavored syrups or juices. It is similar to A smoothie But has A more granulated And icy texture. Slushies are often served in convenience stores, Movie theaters, Amusement parks, And fast food restaurants.
The drink gets its name from its slushy consistency due to the crushed ice particles suspended in the liquid. Slushies come in A wide range of flavors, Including fruit flavors like cherry, Strawberry, Or blueberry, As well as soda flavors like cola or lemon-lime. They are enjoyed for their refreshing And cooling effect, Especially during hot weather.
Method 1: Plastic Bag Method
Step 1: Gather the Ingredients
Before starting the slushie-making process, Ensure you have all the necessary ingredients at hand. These typically include your choice of liquid base (such as fruit juice, soda, or flavored syrup), ice, salt, And any desired flavorings or sweeteners (like fruit puree, Flavored extracts, Or sugar).
Step 2: Pour the Liquid Base into A Sealable Plastic Bag
Take A sealable plastic bag that is large enough to accommodate the slushie mixture. Pour your chosen liquid base into the bag, Leaving some room for expansion during the freezing process.
Step 3: Add Flavorings and Sweeteners
If you wish to enhance the taste of your slushie, This is the step to add flavorings And sweeteners. You can include ingredients like fruit puree, Flavored extracts, Or sugar directly into the plastic bag. Adjust the amount according to your taste preferences.
Step 4: Seal the Bag Tightly
Once you have added the liquid base And flavorings, Seal the plastic bag tightly. Make sure to remove any excess air from the bag, As this will help facilitate the freezing process.
Step 5: Place the Bag in Another Bag Filled with ice and Salt
Now, Take another sealable plastic bag And fill it with A mixture of ice And salt. The salt lowers the freezing point of the ice, Creating A colder environment for the slushie mixture to freeze. Place the sealed bag containing your slushie mixture into the larger bag with ice And salt.
Step 6: Shake the Bags Vigorously for Several Minutes
Hold both bags securely And shake them vigorously for several minutes. The purpose of shaking is to distribute the cold temperature evenly And agitate the slushie mixture, Promoting the formation of ice crystals.
Step 7: Check the Consistency and Repeat Shaking if Needed
After shaking the bags for A few minutes, Carefully remove the inner bag from the ice And salt mixture. Open the bag And check the consistency of your slushie. If it hasn’t reached the desired slush-like texture, Seal the bag again And shake it for A little longer. Repeat this process until you achieve the desired consistency.
Step 8: Serve the Slushie and Enjoy
Once your slushie has reached the perfect consistency, Remove it from the plastic bag And pour it into A glass or cup. You can use A spoon or A straw to enjoy your homemade slushie immediately. Savor the refreshing flavors And coolness on A hot day! But if you make healthy smoothies in a blender. Fear not, because we have a solution for that too! While blenders are usually associated with creating smooth and creamy textures for your favorite smoothie bowl recipes, there’s another tool that can do the job just as effectively—a food processor.
Method 2: Freezer Method
Step 1: Prepare the Liquid Base
Start by preparing your liquid base. This can be your choice of fruit juice, Soda, Or any flavored syrup. Ensure that the liquid is chilled before proceeding to the next step.
Step 2: Pour the Mixture Into a Shallow Container
Take a shallow, Freezer-safe container And pour the liquid base into it. Using A shallow container will help the slushie freeze faster And allow for easier scraping later on.
Step 3: Place the Container in the Freezer
Carefully place the container in the freezer, Ensuring it is level to prevent spillage. Leave enough space in the freezer for the container to sit flat without obstruction.
Step 4: Set Timer for 30 Minutes, Check Mixture for ice Crystals
Set a timer for 30 minutes. This will be the initial freezing time for your slushie mixture. Once the timer goes off, Remove the container from the freezer And check the mixture for the formation of ice crystals. At this stage, The edges of the liquid may start to freeze.
Step 5: Scrape the Mixture with a Fork to Break up the ice
Using a fork, Gently scrape the frozen edges of the mixture towards the center. This helps break up the ice And create A slushie-like texture. Continue scraping until the entire mixture is loosened And resembles slush.
Step 6: Repeat the Scraping Process Every 30 Minutes for 2-3 Hours
Return the container to the freezer And set another timer for 30 minutes. After each 30-minute interval, Remove the container And scrape the mixture with A fork again. This step helps break up any large ice crystals And promotes the formation of A smooth slushie texture. Repeat this process for A total of 2-3 hours, Or until you achieve the desired consistency.
Step 7: Serve the Slushie When the Desired Consistency is Achieved
Once your slushie has reached the desired consistency, It is ready to be served. Use A spoon or A straw to scoop the slushie into A glass or cup. Enjoy the icy goodness And savor the flavors!
Method 3: Ice Cube Tray Method
Step 1: Prepare the Liquid Base
The first step is to create the base for your slushie. You can use A variety of different liquids, Such as juice, Soda, Or even A homemade sugar syrup. If you choose to make A homemade sugar syrup, Simply boil one cup of sugar with one cup of water until the sugar is fully dissolved, Then allow it to cool.
If you’re using juice or soda, Ensure that it’s chilled before you start. This will reduce the time it takes for the liquid to freeze And also helps to ensure the Frosty drink has A better texture.
Step 2: Pour the Mixture into Ice Cube Trays
After you’ve prepared your liquid base, Pour it into ice cube trays. Make sure to not fill them to the brim; Leaving A little space allows the liquid to expand as it freezes.
Step 3: Place the Trays in the Freezer
Next, Place the ice cube trays in your freezer. Try to place them on A flat surface to ensure that they freeze evenly.
Step 4: Allow the Cubes to Freeze for a Few Hours or Overnight
The length of time you’ll need to freeze your cubes will depend on your freezer’s temperature. On average, It should take about four to five hours for them to become completely solid. If you’re not in a hurry, Leaving them in the freezer overnight is A great option.
Step 5: Remove the Frozen Cubes from the Trays
Once your cubes are completely frozen, Remove them from the freezer And quickly take them out of the trays. They should pop out easily. If not, Run the underside of the tray under warm water for A few seconds to loosen the cubes.
Step 6: Blend the Cubes Using a Food Processor or Crush Them with a Rolling Pin
If you have a food processor, This is an ideal tool to turn your frozen cubes into a slushie. Place the cubes in the food processor And pulse until the ice is broken up into small, Slush-like pieces.
If you don’t have A food processor, Place your ice cubes in A strong, Sealable plastic bag, Seal it tightly, And then crush the cubes using A rolling pin or A similar heavy tool until you get your desired Frosty drink consistency.
Step 7: Transfer the Crushed Ice into a Serving Glass
Once you’ve reached the right consistency, Quickly transfer your slushie into A serving glass. Remember, The slushie will begin to melt as soon as it leaves the freezer, So the faster you can do this, The better.
Step 8: Add Any Desired Flavorings or Garnishes
At this stage, You can customize your slushie however you like. You might want to add some fresh fruit, A splash of additional juice or soda, Or even A dollop of ice cream. Add A straw And you’re ready to enjoy!
Step 9: Enjoy the Slushie
Finally, The most rewarding step – sit back, Relax, And enjoy your homemade slushie. Savor the refreshing, Icy goodness that you’ve created right in your own kitchen.
With this method, Making A slushie without A blender is simple And straightforward. It’s A great way to cool off And create A delicious drink that you can customize to your personal taste. Happy slushing!
Conclusion
Making A slushie without A blender is not only possible But also remarkably easy. With simple household items And A little creativity, You can whip up A refreshing, Icy treat right in your own kitchen. Whether you choose to use the Plastic Bag Method, The Freezer Method, Or the Ice Cube Tray Method, Each process offers A unique approach to achieving that perfect slushie texture. Moreover, These techniques allow for A high degree of customization, Letting you experiment with various liquid bases, Sweeteners, And flavorings to create your ideal Frosty drink.
So, Don’t let the absence of A blender deter you from indulging in A homemade slushie. It’s time to embrace these innovative methods And enjoy the sweet, Icy delight of A Frosty drink any time you wish.