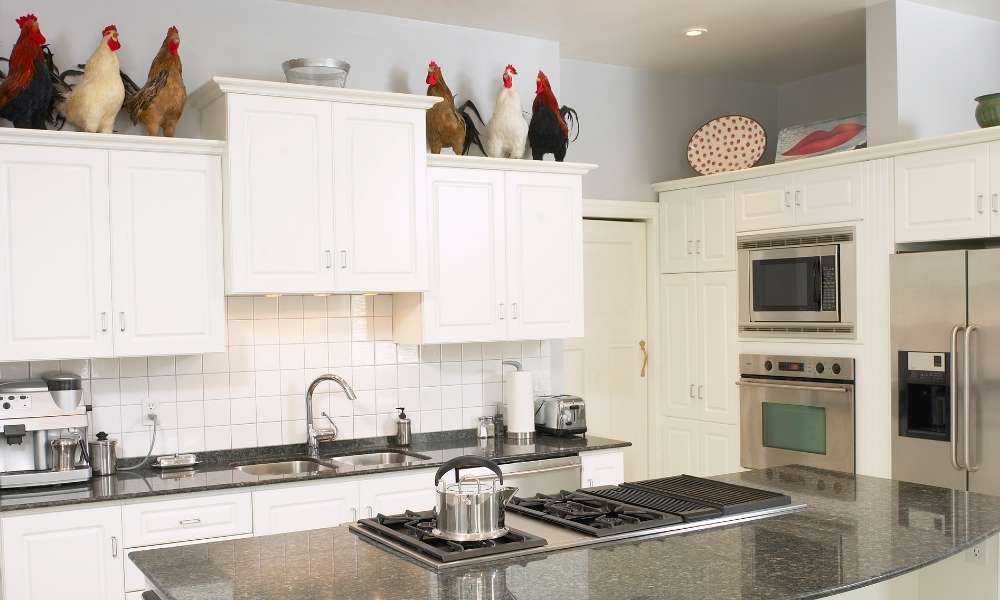
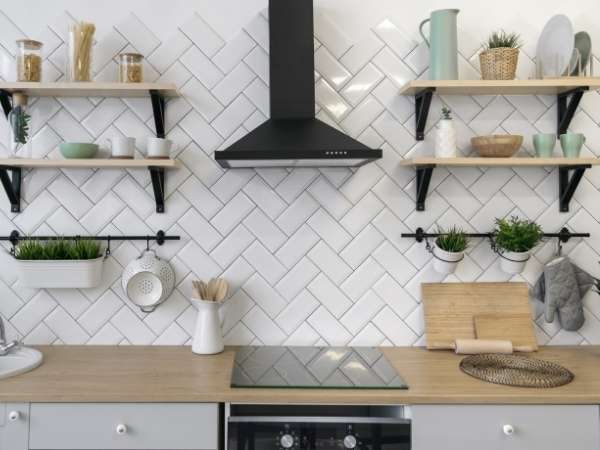
A rooster is not only known as a bird but also known as Rooster. Rooster means male bird but in our case, we use it as the name of a room where men gather so we call it Rooster Kitchen. When we talk about kitchen decor, we don’t just mean furniture or other appliances. You need to consider the entire area including the walls, ceiling, floor, and even the kitchen countertop. If you want the place to look elegant and bright at the same time, adding decorations or designs to them is the best way to help. Many people buy simple items like wall hangings or potted flowers instead of getting creative and adding something unique to it. But these are not enough. You need to go beyond that and learn about Rooster kitchen decorating ideas.
27 Unique Rooster Kitchen Decorating Ideas
1) Metal Rooster Wall Decor
The metal rooster is a popular Chinese symbol of long life, prosperity, and good luck. You can use them with both Chinese and Western-style decorations. The metal rooster can be installed on any type of wall including brick walls, wooden walls, glass walls, etc.
If you want to apply a metal rooster decoration to a wall, we recommend using double-sided tape. Using a sharp object, carefully scrape a small section of the wall where you want to place the rooster. Then, peel off the paper backing, stick the metal side of the decal to the wall and smooth the edges with your hands. If you have trouble sticking the decal down, you can always use a hot glue gun. Once the decal is stuck down, allow it to dry for at least 72 hours before installing additional decorations or painting over the decal.
2) Vintage Rooster Figurines
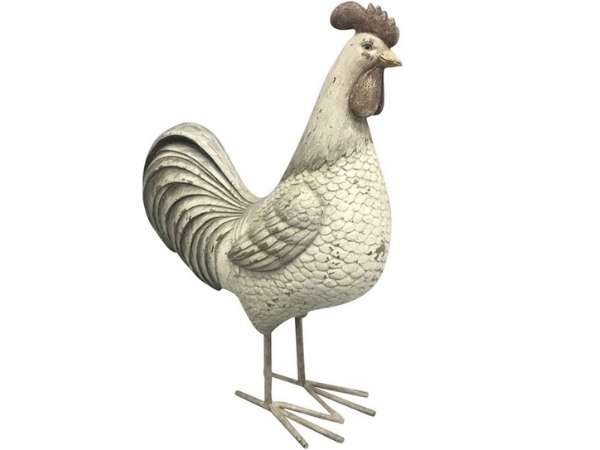
The vintage rooster statue is an iconic symbol of ancient Chinese culture. Apart from the symbolic significance, the image also represents good luck and fortune. Originally they were made of clay, but today they are often made of metal, porcelain, or plastic.
There are many different styles and sizes of these figures. They are commonly sold at antique markets and flea markets. Many collect them as a hobby. Others use them at home to bring good luck and prosperity into their lives.
Here we look at some of the best ways to make your own vintage rooster figurines. Finally, You don’t need any special skills, just a little imagination, and creativity!
3) DIY Rooster-Shaped Cutting Board
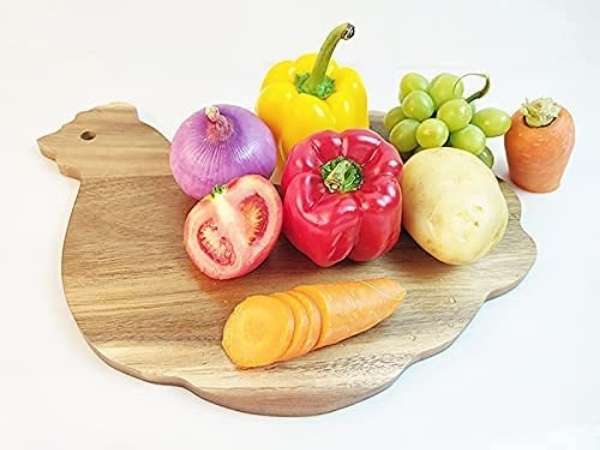
A rooster-shaped cutting board is the best thing ever! I’m not exaggerating here. Therefore, We made a rooster-shaped cutting board using reclaimed wood and some items from the home improvement store. All you need is some woodworking skills and a little time.
You can make one yourself for less.
2. Materials and equipment
The first step was finding reclaimed wood that would work well. Apparently, we probably should have bought the wood from the local lumber yard.
3. Cut your wood
We started by measuring the outside perimeter of each side. To make sure everything fits perfectly, we measured twice. Since we were working with reclaimed wood, the sides didn’t always line up perfectly. Make sure you double measure so you don’t waste valuable ingredients!
Once the initial cut was complete, we moved on to the router. First, we set the depth on the router bit to match the width of our cuts. Then we switch over to shortcuts to make the final cut. Again, measuring helped us make sure we weren’t cutting too deep or too shallow.
4. Sanding down the surface
Once we finished working on both sides, we smoothed the entire surface. Since our boards were already dry, this wasn’t a problem. Just remember that unless the board is completely dry, you’ll want to let it sit flat for several days before sanding.
5. Staining and finishing touches
After staining, we sealed the wood with polyurethane to protect the wood. Now, the board is ready to use. Use it to chop vegetables, fruits, and herbs on any surface.
4) Country Kitchen
1. Ingredients:
2 cups chicken broth
1/2 cup tomato sauce
2 cups of water1 tablespoon of olive oil
1 teaspoon fresh thyme
4 cloves of garlic
1 teaspoon fresh rosemary
1/2 pound boneless skinless chicken breasts
Preparation:
1. Preheat the oven from 300 to 350 degrees Fahrenheit.
2. In a medium bowl, mix together the garlic, thyme, rosemary, salt, pepper, Italian seasoning, and lemon zest.
3. Place chicken on a baking sheet lined with aluminum foil. Roast the chicken for 20 minutes. Remove from the oven, and place the chicken under running cold water for 10-15 minutes. Dry with paper towels.
4. Once the chicken has cooled slightly, cut the meat off the bone and shred it. Set aside.
5) Farm Fresh Eggs
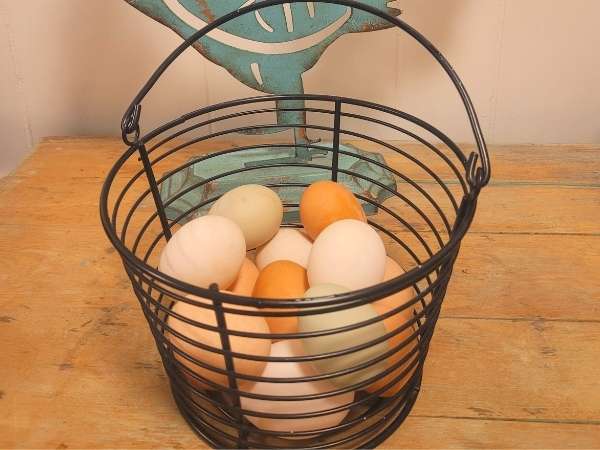
If you want to keep chickens but don’t have a lot of lands to live them in, then maybe using a coop will suit you. Coops aren’t just for keeping chickens at home, although they’re fun and can even come in handy if you want to do some gardening while eating some fresh eggs.
Materials Used:
- Wooden board
- Hammer
- Chisel
- Daw
- Screwdriver
- 2x 4-inch boards (for side panels)
- Drill
- Nails
- Metal bolts
- Wrench set also
Get started on the right track
1. First thing, get your eggs out of their shells! After washing them you can remove the shell.
2. Cleaning the shell
Take a bowl and fill it with water. Then place your eggs in the bowl and give them a little splash. After that, if any dirt remains, rinse with cold water until all is washed away.
3. Separate the yolk and white
After washing them, you should now separate the whites and yolks. To do this, take a spoon and gently pull the two layers of eggs.
4. Remove excess moisture
Next, take a paper towel and dry each individual piece of the egg by squeezing it through the towel.
5. Cracked eggs
Now that all the excess moisture is gone, you need to crack your eggs. To do this, lightly tap the side of the egg 10 times with your hand.
6. Slice the egg
With the shell cracked open, you need to open the egg using a sharp knife. Slice the egg lengthwise and place the slices on a plate and refrigerate until ready to eat.
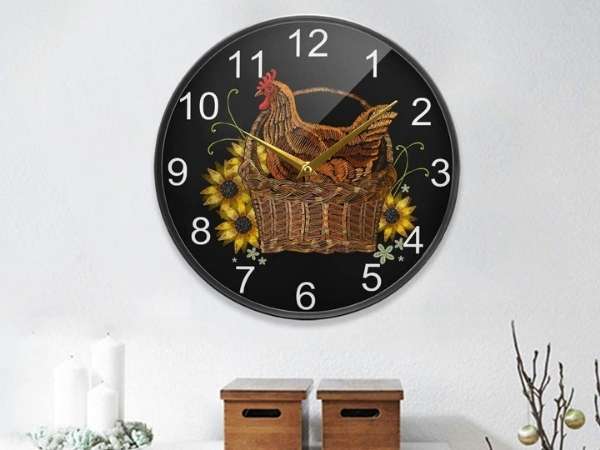
6) DIY Rooster Clock Decoration
Supplies Required:
- Vintage looking clock firstly
- Wooden frame secondly
- Paint – any color you want thirdly
- Drill and bit fourthly
Equipment Required:
- Drill press
- Screwdriver also
Step 1. The hardest part of this project was drilling the holes for the screws. I had to drill two holes on each side of the clock face. I painted my wooden frame black using spray paint.
Step 2. I used chalkboard paint to write the word “Caution” on the top right corner of the wood. Then I applied a layer of red paint to the entire board.
Step 3. Using a pencil, I drew the rooster’s head and eyes and then carefully cut around the outline. Next, I traced around the head on the back of the paper and cut along the lines.
Step 4. Cut the body and tail. To do this, hold the rooster upside down and trace around it with a pencil. Cut along the line. Be sure to cut the paper slightly larger than the actual rooster on all sides. This way you can easily fold the paper and cut out the rest of the chicken later.
Step 5. Decide where you want to place your rooster clock and mark the spot with tape. Take a small hole saw and drill a hole directly in the center of the clock face. Insert your screw into the hole and push it towards the back of the clock. Use a hammer to tap the screw into place if necessary.
Step 6. Place the rooster facing clockwise and align its head with the hole. Attach the rooster to the clock with some strong double-sided tape. Let the clock dry overnight and then enjoy your crafty masterpiece!
7) DIY Rooster Cabinets
Step 1: Choosing a project
In this case, I started with a simple roasting box. So I measured where I wanted the rooster to sit and then measured the space above it. I chose two areas nearby to give the chickens room to roam while sitting. You want to make sure that the rooster can’t fall off the shelf at any point.
Step 2: Cut the Panels
For this step, I decided to cut all the panels to size so they would fit perfectly. If you want to use glue you’ll want to measure twice, and cut once so you don’t ruin the whole project if you make a mistake. Once the panels are cut to size I sand them smooth and paint them black
Step 3: Attaching the Panels
I started by drilling several 4 x 4 studs and screwing them into place to attach the panels to the wall. Then I attached the panel to the back of the studs using some screws. After attaching the panel I screwed the studs directly into the wall.
Step 4: Adding the Door
When I first got these boards I planned to make a door. But after drilling numerous holes for screws and painting the inside of the panels, I no longer wanted to make doors. But I still needed somewhere for my rooster to be, and it felt weird to have him roaming around without a home. So instead I put some shelves on both ends of the box. The shelves were originally intended to hold my DVD player and speakers, but I ended up using them to store my board games and stuff.
8) Oven Mitts, Dish Towels, and Trivets
Dish towels and oven mitts
These two items are perfect if you want to give your kitchen a more rustic look. To add something really unique, take some old dish towels and cover them with fabric paint. Then, use them to create a fun pattern on your countertops. If you have an extra set of oven mitts lying around, use them to create some fun wall art. Just cut off the top of each pair and then glue them to the canvas. Make sure you place them horizontally on the wall when using the canvas, otherwise they may fall off!
Trivet
A trivet is a small platform that elevates hot foods above the rest of your kitchen. These little supports are great for heating up a pot of food, especially if you’re cooking pasta or soup. When purchasing a trivet, choose a sturdy material that won’t bend or break easily. Most of the materials that work well in this application are plastic, wood, ceramic, and metal. You can also consider buying a wooden trivet to complete your kitchen design. To finish off your newly purchased trivet, you can always buy a cute ceramic pot stand or vase to put on top.
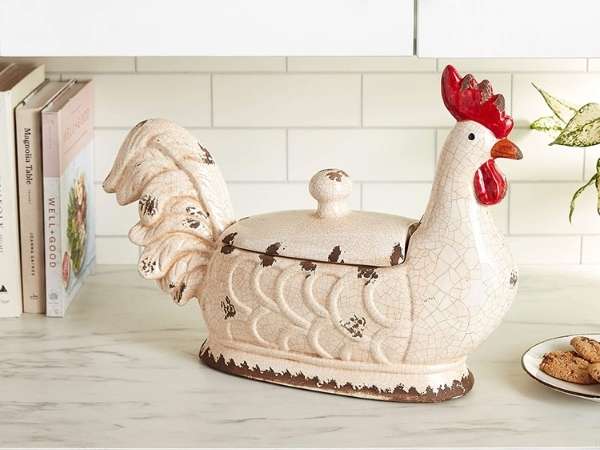
9) Rooster Cookie Jars
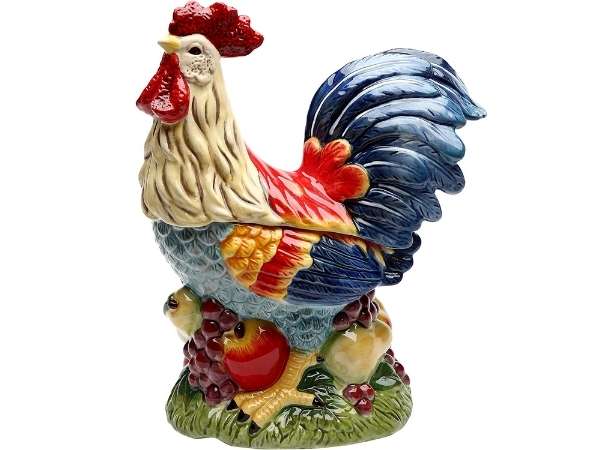
I love roosters! I am a fan of anything that involves roosters. In fact, I’ve been told that if it’s not related to roosters, I don’t care about it. So when I was looking for something to house my rooster in, I came across these cookie jars. I saw them a while ago but didn’t remember where they were until recently. These cookie jars make great gifts for anyone who loves baking and baking. You can choose between two different designs – one with the rooster head on top and the other without. Both look really cute and would make a perfect gift.
10) Dish Drying Mat
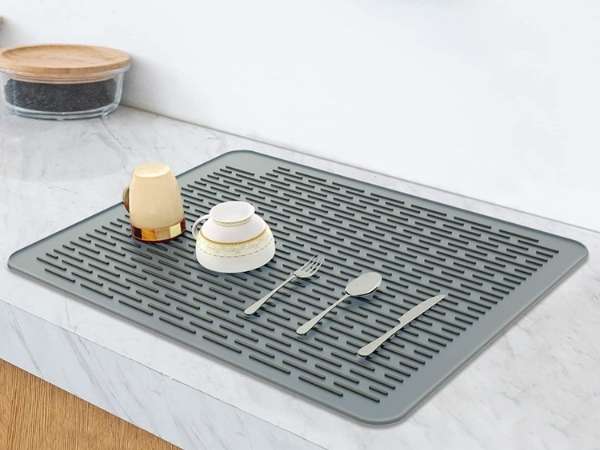
I wanted to make a small dish drying mat for my kitchen at home. I’m using an old wooden cutting board and some scraps of wood I had lying around. Each piece of wood was stained dark brown and then painted white. Dry the paint well after painting. Each piece of wood is cut to size and sanded down to get rid of any rough edges. I love how they turned out and I think they would work great in the kitchen and dining room. Also, I got these cute little cupcake liners from the dollar store and thought they would look great hanging from the rack above my sink.
11) Entrance Rug
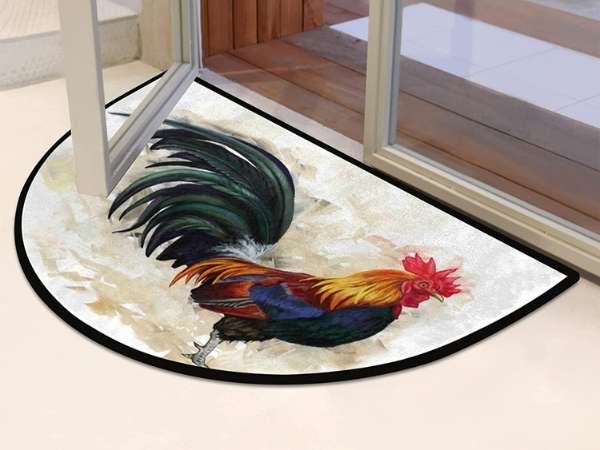
An entrance rug is very useful for your rooster, especially if he is a territorial bird. When you’re walking around, you might step on something offensive and hurt her feelings. The entrance is the first place where everyone comes and goes, so getting rid of these little accidents will allow your rooster to keep his dignity intact.
The best thing about having an entryway rug is that you don’t have to buy anything fancy. A simple piece of carpet will do just fine. Make sure you get a piece of carpet that is durable enough to last. You don’t want a cheap rug that will wear out after only two months or so. Also, be sure to pick a material that won’t stand out. Your rooster should naturally blend into his environment, so choose something that won’t draw attention away from him.
However, we recommend at least 12 inches wide and 24 inches tall. Most carpets sold today are made with it, so you shouldn’t have any problems. You can go bigger depending on the size of your room and how many feet you plan to walk.
You can either hang the rug straight across the door, or you can hang it on the wall using a rod. Just make sure the edge closest to the door isn’t directly above the door, though, because that will block your door handle.
12) DIY Rooster Containers
These DIY chicken containers are a simple, yet beautiful, solution to keeping birds out of trouble while protecting them from cold weather conditions.
First things first – what makes this container unique is its design. The front has a door and porch for the bird to sit and relax, while the sides and back have a mesh panel that keeps the bird safe and comfortable. It allows air to circulate and prevents drafts, while still providing visibility for the owners.
The box comes fully assembled and includes everything you need to get started. It even has a lid that opens to allow access to food and water if desired.
What’s even cooler about this project is how versatile it is. You can turn it into a bathroom enclosure (which I did) or create a bird-friendly laundry room (also pictured). There’s no limit to how fun or creative you want to make this project. If you don’t think you’ll use it as a rooster box, you won’t miss anything after you put it together. But once you decide to put him on it, you’ll be glad you did!
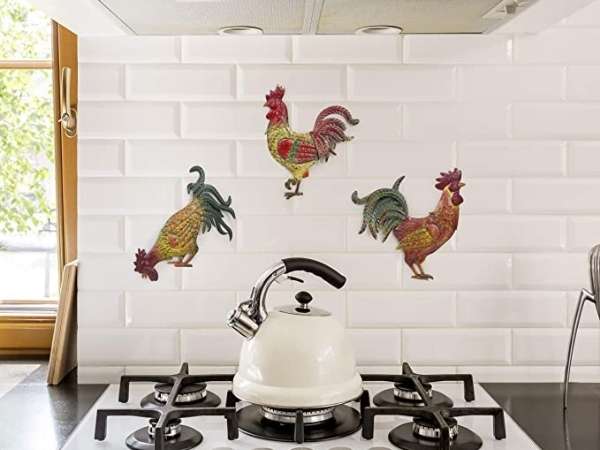
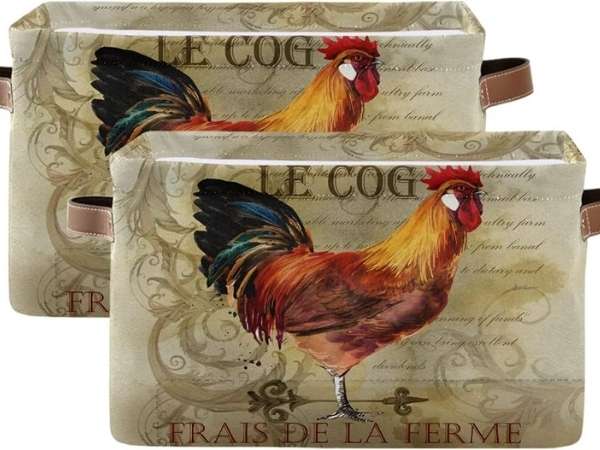
13) Peel and Stick Roosters
Peel and stick chicken is a unique invention that requires no tools! You simply peel off the plastic wrap and stick the rooster to the wall! The rooster sticks to the wall with adhesive tape and is completely assembled. Therefore, The pilling roost design has been adapted to suit all standard sizes and wall shapes.
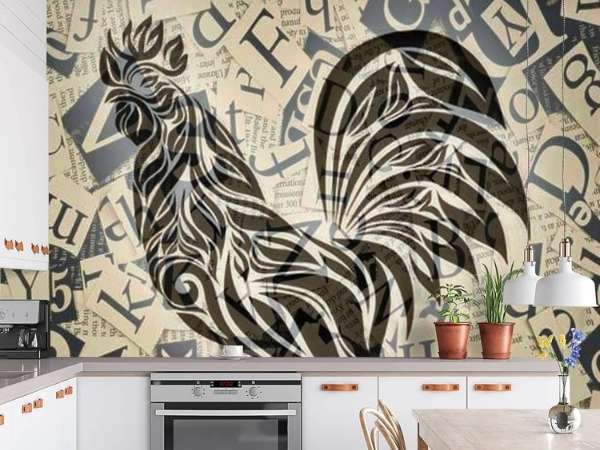
14) DIY Barn Decorations
There are many ways to decorate a barn. I’ve seen some really cool ideas out there that can help make your barn look great! Some people paint the interior of their barn while others use stencils and chalkboard paint to add some character to the space. You can always start with simple things like painting the walls the color you want before going further. There are also custom barn decorations that can be created using unique materials and tools. By doing these DIY projects, you’ll be able to add your own personal touch to your barn without spending a lot of money and time.
15) Rooster Brand Coffee
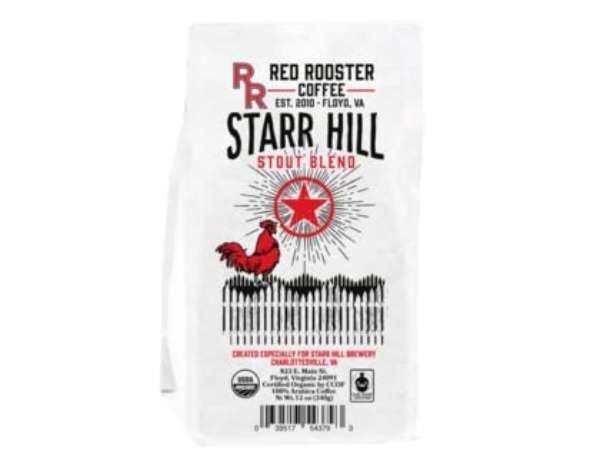
At Roaster Brands we believe that coffee comes alive when connected to nature and our products are never harsh on the environment. We have created a premium brand experience that brings people together over great-tasting coffee. Therefore, Our beans are sourced from around the world and roasted at high temperatures.
The roaster brand offers a variety of specialty coffees that pair perfectly with food and beverages. From flavored lattes and mochas to syrups and hot cocoa mixes, the roaster brand creates delicious treats that are perfect for breakfast, lunch, dinner, and dessert.
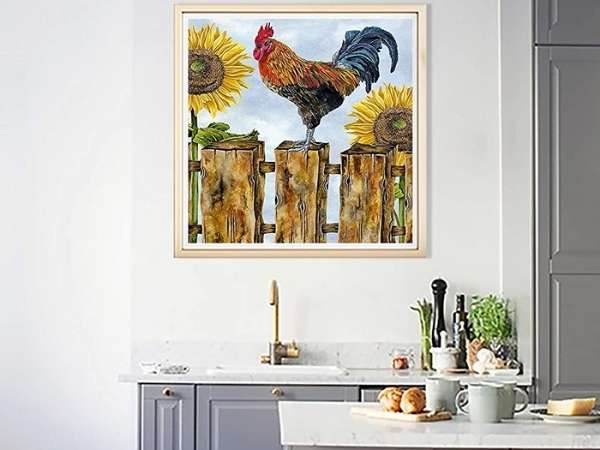
16) Rooster Paper Towel Holder
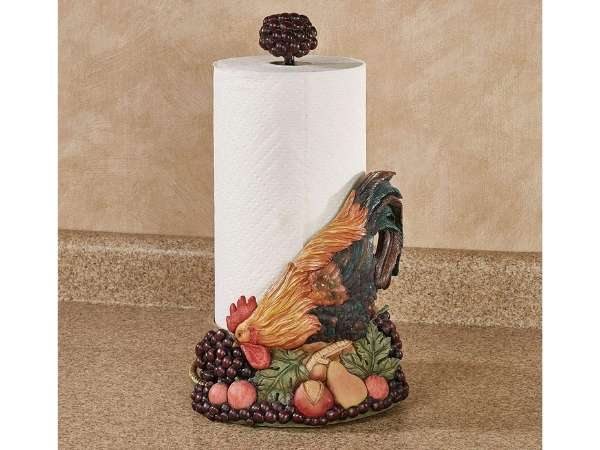
The rooster paper towel holder was inspired by vintage rooster advertising posters I found while cleaning out my parent’s garage. The design features a decorative pattern reminiscent of vintage advertising posters from the 1920s.
The rooster paper towels were designed in collaboration with my husband. We both have a lot of old magazines at home, and we spent hours looking through the pages filled with ads. Then she took her inspiration from those old vintage ads and created these unique paper towel holders for me.
17) DIY Twig Carved Rooster
- Get yourself a bird carving kit. If you don’t have one, you can always go to Amazon and buy the ones I use
- Take firstly a plastic shopping bag. Place it inside and fold the edges over the plastic bag. Fold it twice. Make sure the plastic bag is completely sealed with no holes.
- Go outside and bring back some twigs. if they get wet, the wood can rot.
- Take the wood and place it inside the plastic bag. Place several layers of twigs inside a plastic bag.
- Place the plastic bag inside the bird carving kit. Put the lid down and tighten it well.
- Now you need to carve your rooster! Use sharp tools such as knives or scissors to cut wood. Start at the bottom of the bird and work your way up until you reach the head. Care should be taken not to damage the bird’s body. Once you’ve carved him, take him out of the kit and clean up the mess with a damp rag and soapy water.
- After he’s clean, paint his eyes red and black like mine also.
18) DIY Improve Cheap Decorations
Decorating around the house is something that we do almost every day. We get bored with the same old things and want to spice them up. On the other hand, One way to improve the look of your home is to add some new decor and furniture.
1. Be creative
You don’t need to buy a lot of fancy furniture if you are willing to try different designs. You can use any materials around the house to create a new design. Try using books, magazines, and newspapers – they’re free! Another great way to earn some extra cash is to sell recyclable items online.
2. Create a space
If you’re short on storage space, try building a wall unit. A good solution would be to hang heavy plates or jars on pegs. You can even keep your decorative items in glass cabinets.
3. Use color
To enhance the look of your room, you should use colorful accessories. Add a splash of color to your existing decor with paint or fabric. So, You can match the colors to the theme of your room and even incorporate complementary colors.
4. Add texture
For those who love to sew crafts, it’s easy to add some interesting details to your decor. Therefore, Try sewing curtains, cushions, pillows, or rugs to give your space a unique touch. Another option is to buy custom-made wallpaper.
5. Make a statement
No matter how much you put into decorating, sometimes you just need to make a bold statement. Your home should reflect your personality and passion. So, Be brave and let your creativity flow!
19) Napkins For Rooster Kitchen Decorating
1. Napkin rings
You can use napkin rings to hold food at the dinner table. If you’re not already using rings, this is a great way to hide them!
2. Napkin stand
Napkin stands are an easy way to display the beautiful napkins you’ve purchased. They make a statement anywhere and look good doing it. They are perfect for weddings, receptions, parties, and other events where people tend to sit at long tables anyway.
3. Napkin coasters
Coasters are great for helping prevent hot foods from sliding off your dinner plate. You can easily find plastic coasters at most craft stores, but if you want something better, you can always go ahead and buy something wooden.
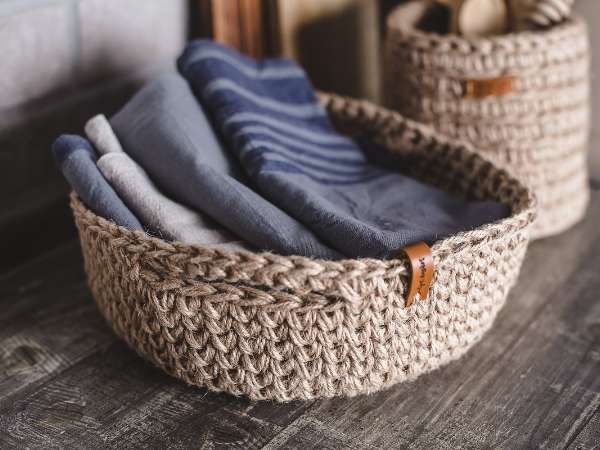
4. Napkin basket
A napkin basket is a perfect solution for storing extra napkins. Most baskets have compartments inside to keep items organized, but you can make your own version if you want.
5. Napkin Drawstring Bag
Drawstring bags are practical for carrying things around the house. However, They are useful for storing napkins, utensils, paper products, clothing, toys, household cleaning supplies, or anything else.
6. Napkin sleeves
Napkin sleeves are great for keeping your hands clean after handling dirty dishes. You can get them in different shapes and sizes and can be placed on the edge of the sink or countertop.
7. The napkin folder
Napkin folders are useful for organizing napkins in specific drawers or cabinets. They are easy to store away and have the added benefit of being machine washable.
20) DIY Paint Roosters
My dad was really tired of my cock constantly poking at the window. He wanted something he could just grab without going into the backyard. So we bought some wooden dowels about 1/8 inch thick and painted them black. Then we attach them to the seal using some nails and a hammer. Now I have no problem grabbing him and throwing him against the wall whenever he wants to get rid of his cock!
21) Rooster Baskets
A rooster basket is a type of basket that was traditionally made of wood or clay. However, They were used to carry water and feed to and from livestock or to store tools and equipment. Today, they are mainly decorative items and can come in a variety of styles and sizes. So, They are often placed outside on fences or posts to attract attention.
There are different types of chicken baskets. Each has a unique design and color scheme and is easily identified by its shape. An example of this would be the Japanese rooster basket. It is characterized by its two long legs and broad body. Another style is the traditional American rooster basket. It has a small opening at the top where the rooster sits. Most people choose classic chicken baskets over others because they look good and add more flair to any garden.
Other types of rooster baskets are known as rooster cages and rooster cages. Therefore, They function similarly to rooster baskets and are used to house roosters and protect them from predators. However, they are generally more expensive than chicken coops.
22) Rooster Holding Salt And Pepper Shakers

Salt and pepper shakers are just one of many styles of fun kitchen accessories. These shakers can easily decorate any countertop in your home and provide a great conversation piece. They make excellent gifts, too!
It makes an ideal gift for special occasions such as weddings, anniversaries, birthdays, or holidays. The rooster with its unique design holds both salt and pepper 12 oz. You can choose between a green or red rooster. Each rooster comes with a lid for added protection
23) Shelf Decoration
Decorating your shelf is not just about making it look good but also about how organized it is. That’s why I decided to share some shelf decorating ideas that will help keep your shelves looking organized and tidy without taking up too much of your day!
If you find yourself struggling to keep your shelves clean and tidy, try using these simple steps:
Clear out your cluttered shelves:
You don’t necessarily have to completely empty your shelves, but make sure they’re free of anything that doesn’t belong there.
Put away everything that is not in its place:
Try to keep things where they belong (especially for kids who tend to play with their toys), and make sure you put things back after playing with them.
24) Rooster Spoon Holders Decorating
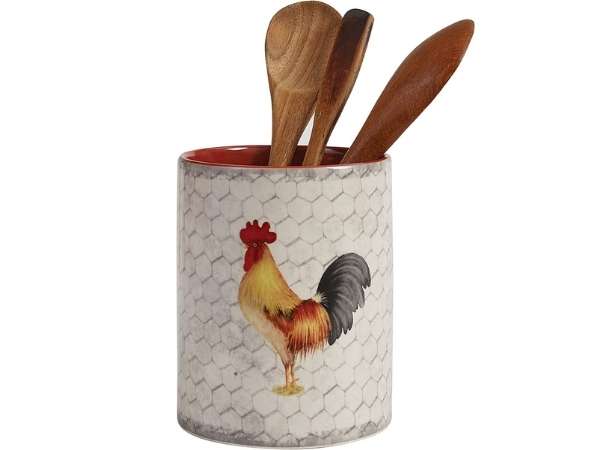
Decorated spoons, commonly known as rooster spoon holders, have become popular items among cultures around the world. Today’s design trends make this decorative spoon attractive to people of all ages. The beauty of these spoons lies in their versatility and durability. However, This decorative spoon is perfect for serving food to guests or entertaining friends and family.
25) Rooster-Shaped Cutting Board
We think that this cutting board can fit perfectly inside our kitchen counter.
- Roaches have several advantages over traditional cutting boards.
- These cutting boards can be used under the sink, without worrying about water dripping off the edges.
- This cutting board is also dishwasher safe.
- You don’t need to worry about them getting dirty while cooking.
- All these cutting boards are made of plastic and they are dishwasher safe.
- This means that you don’t have to clean them after you use them.
26) DIY Red Cabinets

Red cabinets make a bold statement in any room. But the same red color in the kitchen makes them look brighter and punchier. There’s no point in keeping those boring traditional wooden cabinets if they only highlight the ugliness of your decor. Therefore, Give them a modern twist and bring some fun and spunk to your home. Here are nine DIY red cabinetry projects that will add personality to any kitchen without breaking the budget.
27) Rooster Ceramics Bowls
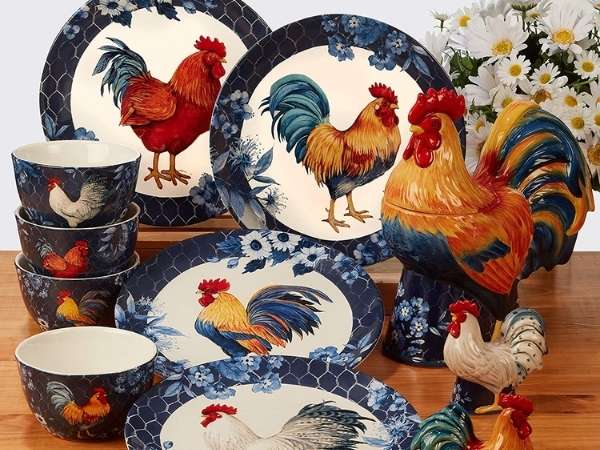
The rooster bowl was originally designed after a Chinese ceramic rooster bird. But I named it after the North American version of the same bird. Rooster bowls are made by hand from clay and fired at high temperatures. Firing takes place between 800F – 1,200F (425C – 550C). Each bowl is unique and size and shape may vary slightly depending on firing time. Therefore, The design of the rooster bowl is inspired by the traditional ceramic rooster design. It is meant to symbolize the beginning of spring and renewal.
Firstly, Rooster bowls are handmade and each piece is individual.
Ceramics vary in color from blue, green, grey, brown, red, orange, yellow, pink, purple, and white.
These bowls are not dishwasher safe. Hand washes only
The lid does not fit over the bowl. Includes lid for use as a flower pot stand.
The underside of the bowl is smooth and flat also.
The Final Thought
I think that the kitchen should not only look beautiful; It should also have good practicality behind its design. Here we have compiled some simple yet effective tips that will help you create a modern and elegant Rooster kitchen.
A rooster can create a centerpiece for your dining table. Also, paint a wooden dowel rod green and then wrap it in yarn or string. You can fasten it to a hook or nail stuck in the wall near your stove. However, you should see, that the color palette is neutral and light pastel tones and how effective the space layout is. So, Hope you understand that rooster kitchen decorating ideas.