Using a Dutch oven for the first time can be an thrilling culinary journey, but it’s critical to apprehend the fundamentals before diving in. Whether you’re seeking to create hearty stews, flawlessly baked bread, or gentle roasts, a Dutch oven is a versatile tool which could raise your cooking. In this guide, we’ll walk you through the whole thing you want to know to get started with your Dutch oven, from instruction and seasoning to getting to know important cooking techniques.
1. Understanding What a Dutch Oven Is
A Dutch oven is a heavy-obligation cooking pot with a decent-becoming lid, designed for flexible use within the kitchen. Known for its durability and functionality to maintain even warmth, this oven may be made from each solid iron or enameled solid iron. The cast iron version is ideal for searing, browning, and sluggish-cooking, at the same time as the enameled model offers the identical advantages with introduced ease of cleansing and no need for seasoning. Whether you’re baking bread, braising meat, or developing a stew, this oven excels at various cooking techniques, making sure that your dishes are cooked flippantly and infused with wealthy flavors. This versatility makes it an integral tool for each amateur and skilled chefs alike.
2. Dutch Oven Necessity For Cooking
A Dutch oven is a need for any important cook dinner due to its outstanding versatility and reliability in the kitchen. Its thick, heavy introduction allows for even warmness distribution, making it first-rate for cooking a huge range of dishes, from gradual-cooked stews to perfectly baked bread. The capacity to move from stovetop to oven in one pot saves time and decreases cleanup, which include to its practicality. Whether you’re simmering, roasting, or braising, this oven ensures constant consequences, helping you create flavorful, gentle dishes every time.
3. Preparing Your Dutch Oven Before First Use
Preparing your Dutch stove before its first use is crucial to ensure long-lasting performance and optimal cooking results. If you have a cast iron Dutch stove, the first step is to season it. Start by washing it with warm water and mild soap, then thoroughly dry it. Apply a thin layer of vegetable oil to the entire surface, inside and out, and bake it in the oven at 350°F for an hour. This process creates a natural non-stick surface and protects the cast iron from rusting. For an enameled Dutch stove, simply wash it with warm, soapy water and dry it completely before use.
4. Essential Tools and Ingredients
Essential tools include sturdy oven mitts for safe handling, wooden spoons for stirring, and scrapers for gentle cleaning. These tools help preserve the Dutch oven’s surface, especially if it’s enameled or seasoned cast iron. For a beginner recipe, consider starting with simple ingredients like vegetables, broth, and meats for a flavorful stew or roast. It’s important to avoid using metal utensils, as they can scratch and damage the surface of this stove.
5. Cooking Techniques for Beginners
Mastering basic cooking techniques with a Dutch stove opens up a world of culinary possibilities for beginners. Whether you’re baking a crusty loaf of bread, braising tender meat, or roasting vegetables, this oven ability to maintain even heat is key.
Start by preheating your Dutch stove gradually on the stovetop or in the oven to avoid thermal shock. When cooking on different heat sources like a campfire, ensure this stove is placed over medium heat to prevent burning. Always monitor the temperature closely and use low to medium settings to maintain consistent heat.
Avoid common mistakes like overheating, which can cause food to burn or stick. With practice, these techniques will help you make the most of this oven, turning out delicious and evenly cooked dishes every time.
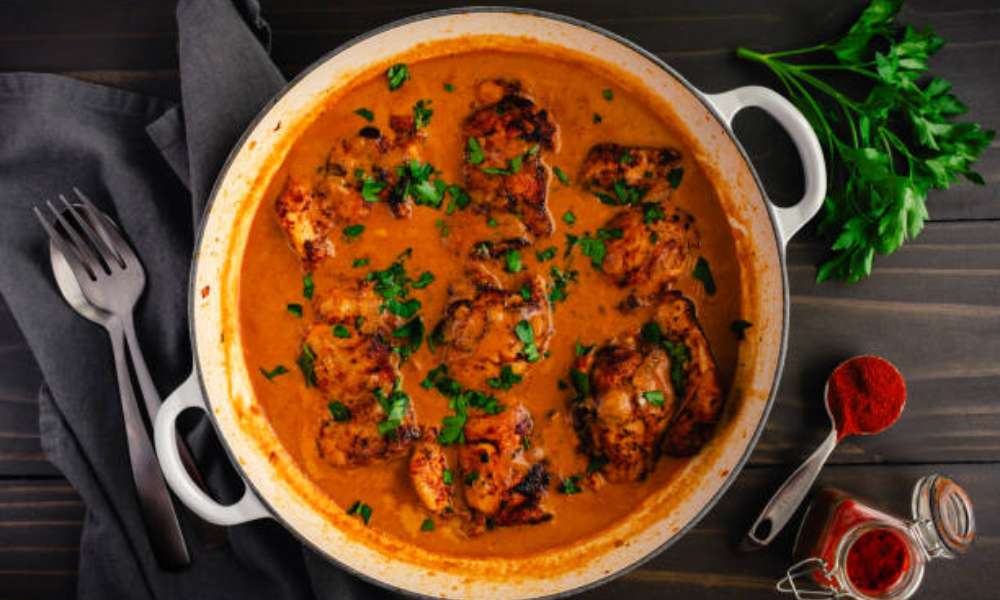
6. First Recipe: A Simple Dutch Oven Dish
For your first recipe with a Dutch stove, try making a simple and satisfying beef stew, a beginner-friendly dish that highlights the pot’s versatility. Start by browning cubed beef in this oven over medium heat, then set it aside.
Add chopped onions, carrots, and potatoes to the pot, sautéing until slightly softened. Return the beef to this oven, add beef broth, tomatoes, and your favorite herbs. Cover the pot and simmer on low heat for about 2 hours, ensuring the stew stays at a gentle simmer. Look for visual cues like tender meat and thickened broth to know when it’s done.
The key to success is maintaining a steady temperature and allowing the flavors to meld over time. This easy-to-follow recipe is perfect for getting acquainte with this stove and enjoying a hearty meal.
7. Caring for Your Dutch Oven After Use
Caring for your Dutch stove properly after each use is essential to maintaining its performance and longevity. For enameled this ovens, clean with warm, soapy water and a non-abrasive sponge to preserve the smooth surface.
Avoid harsh detergents or metal scouring pads that could damage the enamel. For cast iron Dutch ovens, use hot water and a stiff brush to remove food residue, avoiding soap if possible. After cleaning, dry this stove thoroughly to prevent rust.
If your cast iron Dutch stove shows signs of wear, re-season it by applying a thin layer of vegetable oil and baking it at 350°F for an hour. Store Dutch oven in a dry place with the lid slightly ajar to ensure air circulation and prevent moisture buildup.
8. Troubleshooting Common Issues
Troubleshooting common Dutch stove issues can help ensure a smooth cooking experience. If food is sticking, make sure your pot is properly preheated and avoid high heat, which can cause uneven cooking. For discoloration or enamel damage, gently clean with a baking soda paste, avoiding abrasive tools that might worsen the issue. To maintain the seasoning on a cast iron Dutch stove, regularly apply a thin layer of oil after each use, and re-season as needed to keep it non-stick. These simple solutions can prolong the life of this stove and improve your cooking results.
9. Expanding Your Dutch Oven Recipe Repertoire
Once you’re cushty with the fundamentals, expanding your Dutch stove recipe repertoire can elevate your cooking skills. Try extra advanced recipes like sourdough bread, coq au vin, or a slow-cooked chili to discover the full capability of this oven.
Experiment with distinctive cooking techniques, such as braising, baking, and even frying, to find out new flavors and textures. Don’t hesitate to explore cuisines from around the sector, the use of your Dutch stove to create dishes like Moroccan tagines or Italian osso buco. As you strive new recipes, you will find that this stove turns into an fundamental device to your kitchen, allowing you to create a huge form of delicious food without problems.
Conclusion
Using a Dutch range for the primary time is an interesting step toward enhancing your cooking skills and increasing your culinary repertoire. This flexible piece of cookware gives countless possibilities, from easy stews to greater complicated dishes, making it a precious addition to any kitchen. By nicely preparing, the use of, and caring for this oven, you may ensure it stays a reliable device for future years. As you advantage self belief and attempt new recipes, this range will quickly come to be a staple to your kitchen, supporting you create flavorful and memorable meals simply. Embrace the adventure and revel in the scrumptious results!