Reseasoning your solid iron Dutch oven is crucial to maintain its sturdiness and non-stick floor. Over time, even the most cared-for Dutch ovens can lose their seasoning, main to rust and sticking problems. To maintain it acting at its fine, studying how to reseason a cast iron Dutch oven is fundamental. This technique not only protects the iron however also complements your cooking enjoy, ensuring your favourite meals cook evenly and effortlessly. In this guide, you will find out the simple steps to restore your Dutch oven and make it final for years yet to come.
What is Seasoning and Why Does It Matter?
Seasoning—a subtle yet powerful layer that shields cast iron. It’s more than meets the eye. This invisible but essential coating is made of polymerized oil that bonds to the metal through heat, creating a smooth, non-stick surface. Without it, cast iron becomes vulnerable to rust, flaking, and eventual disuse. Reseasoning your Dutch oven strengthens it against moisture, acidic ingredients, and the everyday wear and tear of cooking. For outdoor cooks, seasoning becomes an absolute necessity—exposure to the elements can wreak havoc on unseasoned cast iron. And here’s the beauty of it: the more you season and use it, the richer the patina, enhancing not only the durability but the flavors in your food.
Signs Your Cast Iron Dutch Oven Needs Reseasoning
Is your Dutch oven showing signs of neglect? Don’t worry, it’s not hard to tell when it needs reseasoning. Rust—those telltale orange or brown spots—means moisture has compromised the protective layer. If food begins to stick to what should be a smooth surface, or if you notice the once-shiny black finish turning dull or patchy, it’s time to act. Ignoring these signals could result in cookware that doesn’t perform, and worse, food that doesn’t taste quite right. Timely intervention is key, saving both your Dutch stove and your next meal from disaster.
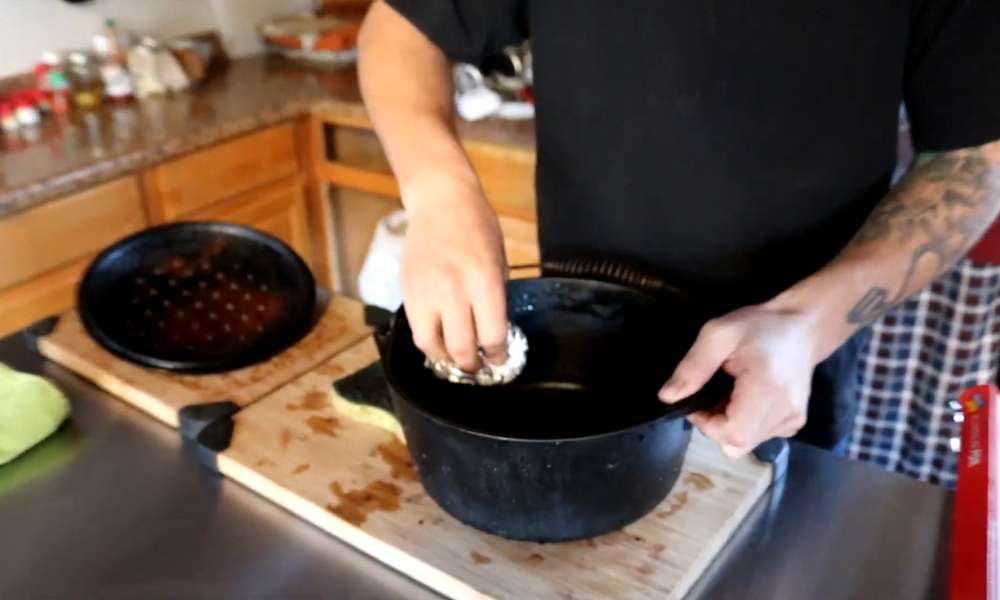
Gathering the Right Materials for Reseasoning
Reseasoning isn’t complicated, but you need the right tools. First and foremost, a high-smoke point oil like vegetable, flaxseed, or grapeseed oil is essential. You’ll also need some lint-free cloths or paper towels to apply the oil evenly and protect your hands from the heat with oven mitts. If rust has taken hold, a steel wool scrubber or stiff brush is your best defense. These humble materials may seem simple, but they are the key to transforming your Dutch oven into a slick, smooth masterpiece once again.
Preparing
Before jumping straight into reseasoning, preparation is everything. Scrub your Dutch oven with hot water, and if absolutely necessary, a bit of gentle soap. Rust? No problem—grab that steel wool or brush and scour away every trace of it. You want the surface completely clean because any lingering rust will only sabotage your reseasoning efforts. Rinse thoroughly and dry it completely, either by hand or with a short stint in a low-temperature oven. This ensures no moisture remains, giving the oil a perfect surface to bond to.
The Best Oils for Seasoning Cast Iron Dutch Ovens
Not all oils are created equal when it comes to seasoning. What you’re after is an oil with a high smoke point that can stand up to the heat. Flaxseed oil is often heralded as the gold standard—it polymerizes well and leaves a hard, glossy finish. Grapeseed oil also deserves mention for its high smoke point and neutral flavor. Even common vegetable oil can get the job done if you’re on a budget. Whichever you choose, the oil will subtly influence the taste of what you cook, so pick according to your personal preference.
Applying Oil to Your Dutch Oven: The Key to a Perfect Season
Now, the heart of the process: applying oil. Pour a small amount into the Dutch oven and spread it evenly with a lint-free cloth, making sure to cover every inch—inside, outside, handles, and lid. The trick here? Use just a thin layer. Too much oil will leave your Dutch stove sticky instead of sleek. After spreading, use another clean cloth to wipe away excess oil, ensuring only the right amount stays behind. This is crucial for creating that smooth, non-stick surface.
Baking Your Cast Iron Dutch Oven for Seasoning
Once oiled, it’s time to bake. Place your Dutch oven upside down on the oven rack, using a sheet of foil below to catch drips. Set the oven to 450°F and let it bake for one hour. This high heat will cause the oil to bond with the iron, creating a durable, protective coating. After the hour is up, turn off the oven but leave this oven inside to cool gradually. This slow cool-down ensures the seasoning hardens evenly, without cracking.
Repeating the Seasoning Process for Best Results
Perfection takes patience, and one layer of seasoning might not be enough. To really get that non-stick, long-lasting finish, consider repeating the oiling and baking process. Three to five layers are ideal for those seeking a truly resilient surface. Each additional layer builds upon the last, making your Dutch oven not only more durable but also easier to cook with. Trust the process—the more you season, the more this oven will reward you with exceptional performance.
Caring for Your Cast Iron Dutch Oven After Reseason
Reseasoning is simply the beginning; worrying to your Dutch stove after each use is important. Clean it with heat water and a gentle brush—no soap, as it may strip away the seasoning. Dry right away to save you rust, then apply a mild coat of oil earlier than storing. This simple routine ensures that this oven remains in pinnacle situation, geared up to deliver non-stick performance and maintain the flavors of every dish you cook dinner.
Common Mistakes to Avoid When Seasoning a Dutch Oven
Even the first-rate of us make errors, however with a little knowledge, they’re effortlessly prevented. Too much oil? You’ll emerge as with a sticky, uneven surface. Not sufficient warmness? The oil gained’t bond nicely. Forgetting to clean very well ahead? Leftover rust or residue can break your tough work. By guidance clean of those commonplace pitfalls, you’ll guarantee a perfectly pro this oven, equipped for motion.
How Often Should You Reseason Your Cast Iron Dutch Oven?
The frequency of reseasoning largely depends on usage. If you cook with your Dutch stove frequently—especially acidic foods like tomatoes—it may need reseasoning every few months. With proper care, though, a well-seasoned Dutch Stove can go years without a full reseason. Keep an eye on it; when rust appears or food starts to stick, it’s time to give this oven a little love.
Using Your Reseasoned Dutch Oven for Garden-to-Table Meals
With a newly reseasoned Dutch stove, the culinary possibilities are endless. Whether you’re slow-cooking fresh vegetables or roasting meats, a well-seasoned oven evenly distributes heat, making it perfect for farm-to-table cooking. Bake a golden loaf of bread or stew some homegrown herbs. This oven will make sure the flavors shine through, turning garden-fresh ingredients into unforgettable meals.
Storing
Proper storage is essential for maintaining your Dutch stove’s seasoning. After cleaning and oiling, store it in a dry place. Don’t seal it with the lid—leave it slightly ajar or place a paper towel between the lid and pot to allow air circulation. This simple step can make all the difference in preserving the seasoning for years to come.
Conclusion
A cast iron Dutch stove, when cared for properly, is an investment that will last a lifetime. Seasoning is the key to unlocking its full potential. By taking the time to reseason and maintain this oven, you’ll ensure it remains a non-stick, rust-free powerhouse in your kitchen. Whether it’s crafting garden-to-table masterpieces or whipping up family favorites, a well-seasoned oven is the cornerstone of cooking enjoyment.