Baking sourdough bread at domestic has emerge as increasingly more popular, and one of the pleasant methods to acquire a perfect loaf is by using a Dutch oven. Learning how to bake sourdough in a Dutch oven ensures you get a beautifully crusty outdoors and a smooth, ethereal interior. This traditional approach utilizes the Dutch oven’s capacity to maintain heat and create steam, mimicking a professional bakery oven. In this guide, we’ll walk you via every step of the method, from making ready your sourdough starter to attaining that ideal bake, so you can revel in delicious, selfmade sourdough bread every time.
Ingredients And Tools:
Ingredients
- Flour
- Water
- Salt
- Sourdough Starter
Optional Ingredients For Flavor Variations ( Seeds, Herbs, Or Dried Fruits To Add Unique Flavors To Your Sourdough.)
Tools
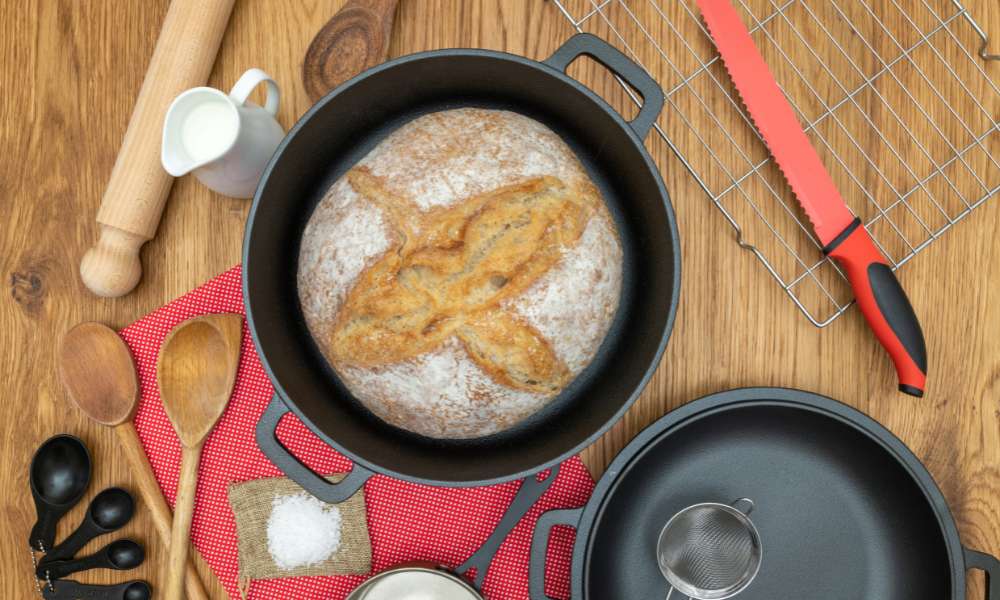
- Dutch Oven
- Mixing Bowls
- Dough Scraper
- Proofing Basket Or Bowl
- Kitchen Scale
- Thermometer
- Razor Or Sharp Knife For Scoring
Preparation
Proper preparation is crucial for baking perfect sourdough in a Dutch oven. This includes feeding the starter, mixing the dough, and mastering the kneading and folding techniques.
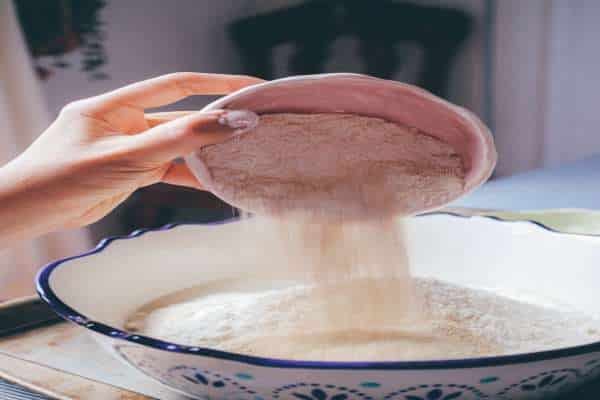
Feeding the Starter
To feed and maintain a healthy sourdough starter, combine equal parts of starter, flour, and water. Mix until smooth and let it sit at room temperature until it becomes bubbly and doubles in size. This typically takes 4-12 hours, depending on the ambient temperature. The starter is ready for baking when it passes the “float test” – a small dollop should float in water.
Mixing the Dough
Start by combining the sourdough starter, flour, water, and salt in a large mixing bowl. Mix until no dry flour remains. This stage is known as the autolyse process, where the dough rests for 20-60 minutes to hydrate the flour fully. Autolyse helps improve the dough’s extensibility and structure, making it easier to work with and resulting in a better crumb.
Kneading and Folding
Kneading and folding are essential techniques for developing gluten. Begin by kneading the dough until it becomes smooth and elastic. During the bulk fermentation, perform a series of folds to strengthen the dough. To do this, stretch and fold the dough over itself every 30 minutes for 2-3 hours. This process helps build strength and structure, crucial for achieving a well-risen loaf.
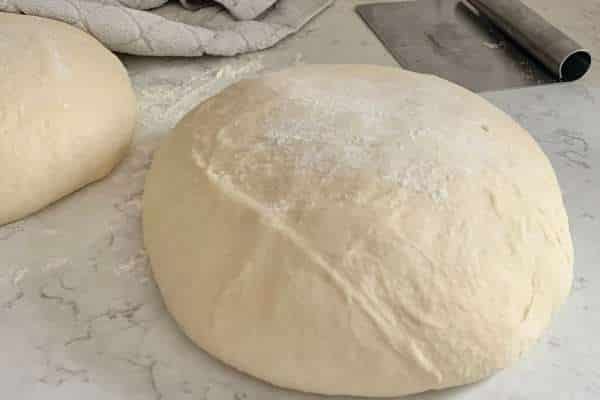
Bulk Fermentation
During this phase, the dough undergoes its initial fermentation, allowing the yeast and bacteria to develop flavor and structure. Ideal conditions for bulk fermentation include a room temperature environment between 75°F to 82°F (24°C to 28°C). This process typically takes about 4 to 6 hours, depending on the ambient temperature and dough hydration.
To determine when the dough is ready for shaping, look for a noticeable increase in volume, usually doubling in size. Additionally, the dough should feel airy and bubbly, with a slightly domed surface. A gentle poke test can also help; if the dough slowly springs back but still leaves a slight indentation, it’s ready for the next step.
Shaping the Dough:
Shaping Techniques
To shape the dough, start by gently turning it out onto a lightly floured surface. Using a dough scraper, divide the dough if making multiple loaves. Gently flatten the dough into a rectangular shape and perform a series of folds: fold the bottom third up, then the top third down, and finally, fold the sides in. Turn the dough seam-side down and gently shape it into a tight ball by cupping your hands around it and rotating it. This helps build surface tension, crucial for a good rise and crust.
Second Rise
Once shaped, transfer the dough to a proofing basket or a bowl lined with a floured cloth, seam-side up. The second rise, also known as proofing, allows the dough to develop further. Ideal conditions for this stage are a cool room temperature or, for a longer, slower rise, refrigerate the dough for 12-24 hours. To determine readiness, the dough should have visibly risen and feel slightly puffy to the touch. An indentation made by a gentle poke should spring back slowly, indicating it’s ready for baking.
Baking
Baking sourdough in a Dutch oven is the final step that transforms your dough into a delicious, crusty loaf.
Preparing the Dutch Oven
Begin by preheating your Dutch oven in the oven at 475°F (245°C) for at least 30 minutes. This ensures it is hot enough to create the perfect baking environment. When handling the hot Dutch oven, use oven mitts or heat-resistant gloves to prevent burns. Always place the hot lid on a heatproof surface.
Scoring the Dough
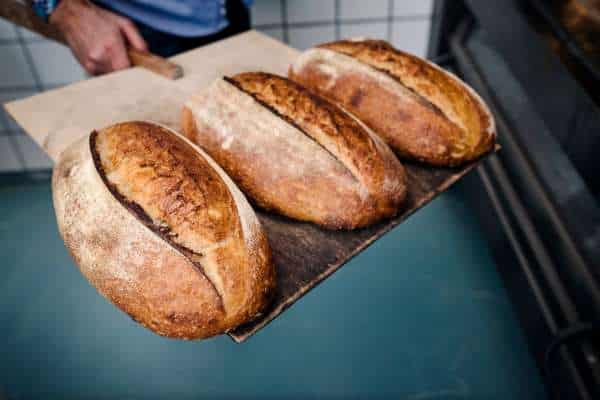
Scoring the dough is essential for controlling how the bread expands during baking. Use a razor blade or a sharp knife to make shallow cuts on the surface of the dough. Common techniques include a single long slash or multiple diagonal cuts. Proper scoring allows the dough to rise evenly and creates an attractive pattern on the crust.
Baking Process
Carefully transfer the scored dough into the preheated Dutch oven. Cover with the lid and bake at 475°F (245°C) for 20 minutes. The steam trapped inside the Dutch oven helps create a crisp, golden crust. After 20 minutes, remove the lid to allow the crust to brown further. Continue baking for an additional 20-25 minutes until the loaf is deep golden brown and sounds hollow when tapped on the bottom.
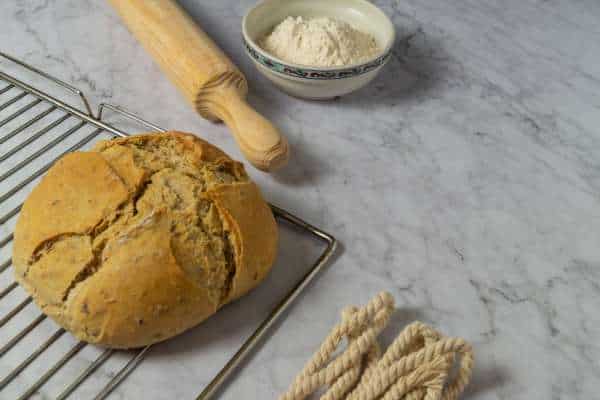
Cooling and Storing
Properly cooling and storing your sourdough bread ensures it remains fresh and flavorful.
Cooling the Bread
Allowing the bread to cool is crucial for achieving the best texture and flavor. Freshly baked bread continues to cook as it cools, so it’s important not to cut into it right away. Let the loaf cool on a wire rack for at least 1-2 hours. This time allows the interior to set and the crust to maintain its crispness. Cutting into hot bread can result in a gummy texture, so patience is key.
Storing Sourdough Bread
To maintain the freshness of your sourdough bread, store it at room temperature in a paper bag or a bread box, which helps retain its crustiness while preventing it from becoming soggy. Avoid using plastic bags, as they trap moisture and can make the crust soft. For longer storage, consider freezing the bread. Slice the loaf before freezing so you can easily thaw individual pieces as needed. Wrap the slices in plastic wrap or foil, and place them in a resealable freezer bag. When ready to eat, thaw the slices at room temperature or toast them directly from the freezer.
Troubleshooting:
Common Issues
Flat Bread: One common problem is flat bread, which often results from insufficient gluten development or overproofing.
Dense Crumb: A dense crumb can occur due to underproofing or not enough steam during baking.
Overproofing or Underproofing: Overproofing makes the dough weak and collapsible, while underproofing results in a dense, tight crumb.
Solutions and Tips
To address these issues, start by ensuring proper gluten development through adequate kneading and folding. If your bread is flat, check your proofing times; the dough should be airy and doubled in size before baking. For a dense crumb, make sure your dough is adequately proofed; use the finger dent test to check readiness—press your finger into the dough, and it should spring back slowly. To avoid overproofing, keep an eye on the dough during its rise and adjust the time based on room temperature. For underproofing, extend the proofing time until the dough is properly risen and airy. Incorporating enough steam in your baking process can also help achieve a lighter, more open crumb.
Conclusion
Baking sourdough bread in a Dutch oven is a rewarding manner that combines subculture with contemporary strategies to supply a delicious and nutritious loaf. By following the special steps of feeding the starter, blending the dough, kneading and folding, bulk fermentation, shaping, and subsequently baking, you could reap bakery-exceptional sourdough at home. Properly cooling and storing your bread guarantees it remains clean and flavorful, while troubleshooting not unusual troubles helps you refine your approach. With practice and patience, you will experience the art of sourdough baking and savor the delight of making a really perfect loaf. Happy baking!