Keeping your enamel dutch oven clean isn’t just a matter of hygiene; It is important to keep the capability and aesthetic enchantment of the kitchen. An teeth Dutch oven, recognized for its sturdiness and flexibility, may be a kitchen staple for the whole thing from simmering stew to baking bread. However, the tooth coating requires unique care to save you damage and maintain its brilliant finish. In this manual, we’re going to walk you thru the right techniques to successfully clean your enamel dutch oven, tackling those stubborn stains similarly to day by day cleansing. These simple steps will help you preserve your Dutch oven in pristine circumstance, decorate your cooking experience, and make bigger the existence of this crucial cookware.
Gathering Necessary Materials
- Soft Sponge Or Dishcloth
- Gentle Dish Soap
- Baking Soda
- Vinegar (Optional)
- Rubber Or Silicone Spatula
Letting The Dutch Oven Cool Down
Before diving into the cleaning process, it’s crucial to let your enamel Dutch oven cool down completely. Handling your Dutch stove while it’s still hot can be dangerous, and sudden temperature changes might damage the enamel. Patience is key here; give it sufficient time to reach room temperature naturally. This not only ensures your safety but also protects the integrity of your cookware. Waiting for your Dutch oven to cool down is a simple yet essential step in maintaining its condition and effectiveness in your culinary adventures.
Basic Cleaning Method:
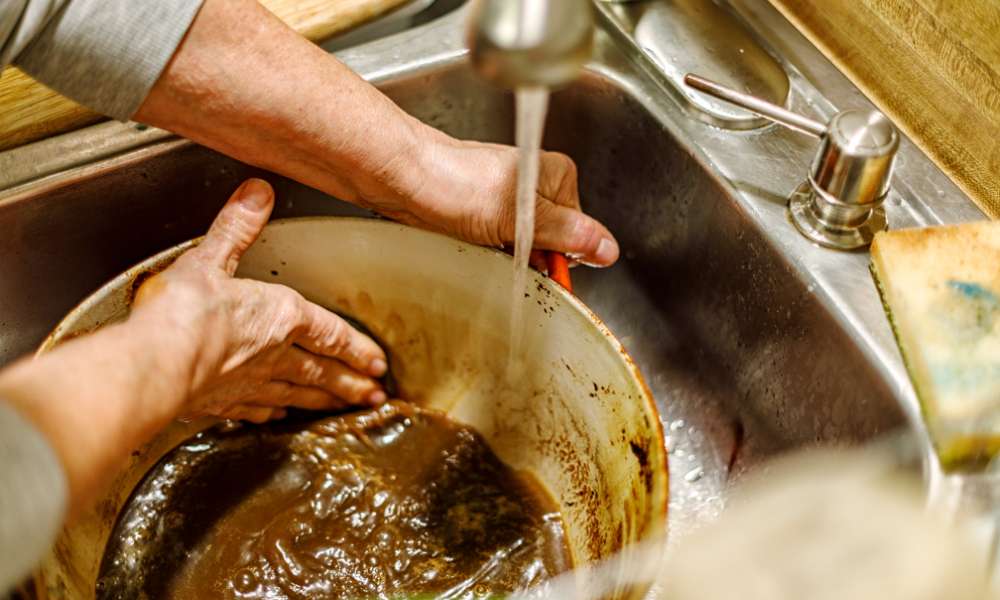
Washing with Warm Soapy Water
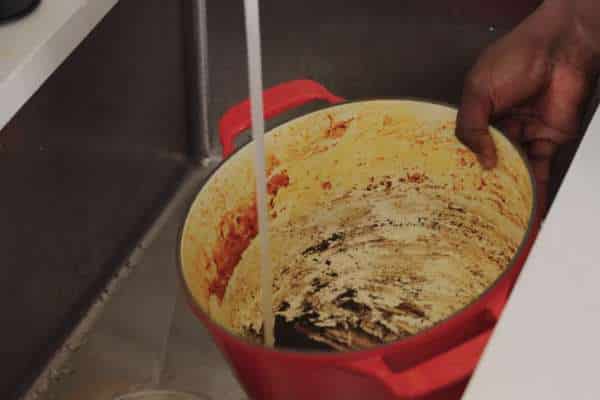
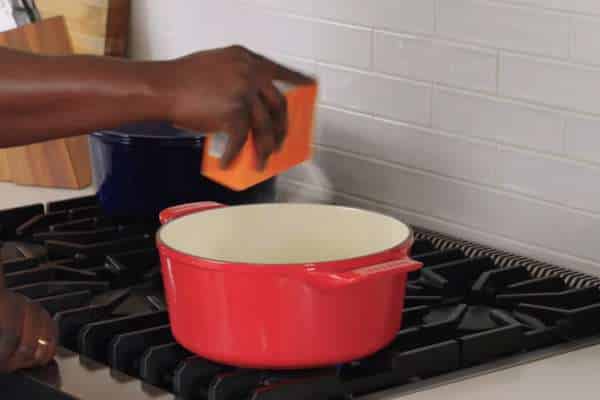
To ensure your enamel Dutch oven is clean properly without causing any damage, start by filling it with warm water. The warmth helps loosen any food particles, making them easier to wash away. Add just a few drops of gentle dish soap to the water—opting for a mild cleaner preserves the enamel’s shine and integrity. Next, take a soft sponge and gently scrub the surface of the Dutch oven. Be mindful during this process to avoid scratches that can occur from aggressive cleaning. Use light, circular motions to effectively clean without harming the enamel.
Rinsing and Drying
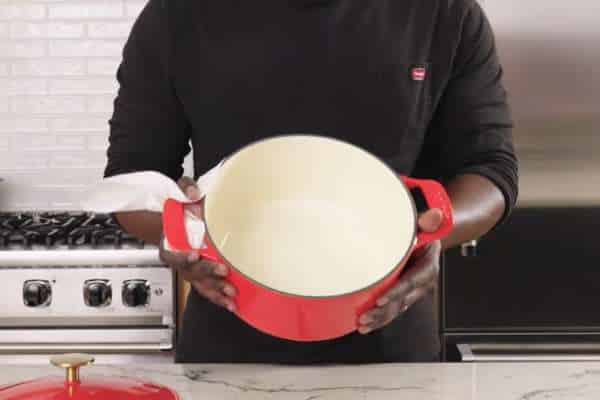
After washing, it’s crucial to rinse your Dutch oven thoroughly with warm water. Removing all soap residues ensures that no soapy taste lingers, and it also prevents damage to the enamel finish. Once rinsed, do not let the Dutch stove air dry as this can lead to water spots which mar its appearance. Instead, take a soft towel and dry the Dutch stove immediately. This step not only prevents water spots but also aids in maintaining the lustrous finish of your cookware, keeping it looking new and ready for your next culinary creation.
Addressing Stubborn Stains and Food Residues:
Using Baking Soda for Tough Stains
When it comes to tackling stubborn stains and food residues on your enamel Dutch stove, natural cleaners like baking soda and vinegar can be highly effective. Start by making a paste with baking soda and a little water. This paste is gentle yet abrasive enough to tackle tough stains without scratching the enamel surface. Apply it directly onto the stains, and gently scrub using a soft sponge or cloth. Allow the paste to sit for a few minutes to break down the residue. After scrubbing, rinse your Dutch oven thoroughly and reassess the stain. If remnants remain, a second application might be necessary.
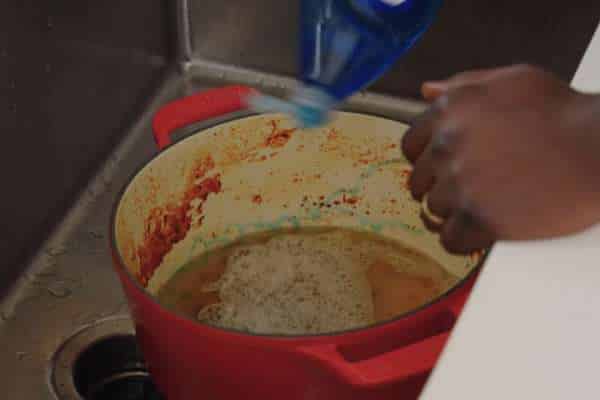
Utilizing Vinegar for Additional Cleaning Power
For additional cleaning power, especially for lingering odors or tougher stains, vinegar can be your go-to solution. Create a mixture of equal parts water and white vinegar and fill the Dutch oven with this solution. Allow it to soak for about an hour; this soaking period helps the vinegar break down the residues effectively. After soaking, rinse the Dutch oven thoroughly with warm water to remove any vinegar smell and residues, ensuring your cookware is clean and ready for its next use. These natural cleaning methods are not only effective but also environmentally friendly and gentle on your precious cookware.
Special Considerations:
Avoiding Harmful Cleaners
When worrying in your enamel Dutch range, it is important to remember of the cleaners and gear you use to keep away from adverse this critical cookware. Avoid abrasive pads, harsh chemical substances, and any metal scouring tools. These items can scratch or erode the enamel coating, leading to a compromised cooking floor that may rust or react with ingredients. Instead, choose gentle sponges and mild soaps to keep the integrity and look of your Dutch oven.
Handling Chipping or Cracking
In the occasion that your Dutch oven does revel in chipping or cracking, it is vital to evaluate the quantity of the damage. Minor chips at the outdoors may still permit for secure utilization, at the same time as any cracking or chipping on the internal floor usually manner the Dutch oven should now not be used for cooking as it is able to leach materials into food. To save you such harm, always avoid sudden temperature adjustments (like transferring from stove to fridge), and by no means drop or bang the cookware towards hard surfaces. These precautions help maintain this oven in prime situation, ensuring a protracted life in your kitchen arsenal.
Maintenance and Storage:
Regular Maintenance Tips
Proper maintenance and storage of your enamel Dutch stove are key to ensuring its longevity and performance. Regular cleaning is essential; how often you should clean it depends on your frequency of use. For daily users, a quick wash after each use is recommended, while less frequent users should ensure it’s cleaned thoroughly before storing. Speaking of storage, it’s crucial to store this oven in a dry place and, if stacking with other cookware, use a layer of soft cloth or paper towel between them to prevent scratches and chips.
Seasonal Checks
Additionally, performing seasonal checks on your Dutch oven can help you catch any signs of wear or damage before they become serious problems. Before entering periods of heavy use, such as during holiday seasons when you might be cooking more frequently, inspect your Dutch oven for any chips, cracks, or significant enamel wear. Addressing these issues early can prevent further damage and ensure your cookware is safe and effective for preparing your favorite dishes. These simple steps will keep this oven in prime condition, ready for whatever recipe comes next.
Conclusion
Proper care and upkeep of your enamel Dutch range are critical for maximizing its software and lifespan. By following the mentioned steps for cleaning, addressing tough stains, heading off harmful cleaners, and making sure regular upkeep and cautious storage, you may preserve the pristine situation and capability of your cookware. Remember, the attempt you put into preserving this oven not handiest complements your cooking revel in but also ensures that this kitchen staple can be part of your culinary adventures for years yet to come. Whether you are simmering, sautéing, baking, or braising, a well-maintained oven is an invaluable tool inside the kitchen. Keep these hints in mind, and this oven will continue to serve you nicely, meal after delicious meal.